
CH
INTERACTION
Introduction to Interactive media - 13/1/2021 - Week 14
How have we, as a society, benefitted from interactive media:
Easier communication - face time people
Technological advances in gaming (consul PC)
information exchanges have grown - greater info access due to the internet
more learning opportunities - educational - BBC bitesize
loniless - easyer to keep in touch with people, can bring people together. Although too much will be neglect of the real world.
4th industrial revolution right now. At a point where every technological age has halved in time. 1950s to 1970s digital revolution. Now working at a pace where we can comprehend. A.I film - technology out competes humans. We only know its happened after it happened. Biggest fear, out preforms humans.
.com boom in the 90s, crashed in the 2000s. Amazon then took over and allowed instant buys. New piece of technology. Forerunner that has success. Follow up company that builds on it and does it even better. My space 1st, Facebook 2nd. Bebo over taken by YouTube. 1 company does the interactive experience first, people eventually loose interest and it falls apart. 2nd company will then come in and do it better, killing off any competition.
OBJECTIVES:
1. explore interactive media
2. create interactions using google slides

TASK - List what types of interactive media you know or have used - GROUP TASK
1. The Format of Interaction (e.g. the technology or hardware)
This is how the user interacts. What they physically do to input and affect the task going on.
It is also the hardware and software used as well. If the purpose is why and the type is what then the format is how. We normally interact with touch sensitive pad or by clicking/pression buttons. We want to make this as easy as possible in order to be as accessible to as many as possible. We also want to keep their attention. Doesn't matter how great our purpose if no one want to interact to begin with.
Maps, quizzes, games, graphs, leader boards, votes and surveys are all ways of interacting, keeping an audiences attention.
People interact with gaming through either keyboard and mouse or controllers. The hardware used for most social medias is the phone. Advertising can take place on a number of formats such as videos (presented on the TV, cinema and sites like YouTube) and posters (billboards, busses, down the street...).
e.g. smart phones, tablet, aspect ratios...
2. The Type of Interaction
These are the types of interactions, The many different items that can be interacted with. many of the examples come from my own personal experience through out the year. The actual types of interaction was found on the website linked below.
Apps – application software's built for phones (e.g. weather app)
Games – for entertainment, engages the audience and could resembles a brand new digital world (open world). E.g. Fallout 4
Virtual Reality - Like games, its for entertainment but much more immersive. Makes the user feel like they are personally exploring a digitally constructed world (a twin to reality) - for example Skyrim VR.
Pervasive Games – Mixes virtual and physical environments, e.g. augmented reality (Pokémon go).
Interactive Video – Videos and TV with interactive features, like streaming the series live, let the audience influence the show. E.g. Im a celebrity get me out of here.
Publication – Websites, allows the user to navigate, communicate and join in. (e.g. YouTube)
Social Media – Digital communities, used for near instant communication. It can also allow the share of information (photos, videos) extremely fast.
e.g. Facebook, Social media. It can come in the form of an app or website. Designed to keep people scrolling and allows for instant communication, uploads of photos and videos, streaming, shopping (Facebook market place).
Advertising – Digital, in or out door that uses interactive features. For example, a digital poster that reacts when people get near it.
Theme Park – combine media, for example a movie, with physical elements to create a new experience. E.g. the Lego Ninjago ride at Legoland.
Cinema – Interactive Cinema, allows audience to play a roll in the film. Some films with alternative endings depending on the choice. 4D is another example, where the film directly affects the audience physically.
3. The Purpose of Interaction
This is why we interact with them, how we benefit from putting our time and energy into an interactive task. Participation is the main goal of an interaction and the best way to get people interest is to give them a reason to join in.
Learning/Educational
Many schools use interactive technologies to help engage students in lesson. Tasks such as quizzes and educational games help the mind of old and young. Websites like Kahoot are literally designed for this. Teachers can create multiple choice quizzes to test student son their knowledge and turn it into a point based competition. This adds a competitive element into the mix and makes what would of been mundane fun. it not only tests if you know the information but how fast you can recall it. The quiz and its inputs (such as the multiple choice buttons to press) is the format. Kahoot (the website) would be the type, what people are actually engaging with. And finally the purpose would be to test those of their knowledge and highlight any gaps present. Improve skills such as working under pressure and dealing with a competitive environment. This is just 1 way interaction can be used to engage in educational ways.
Thinking/development of skills
There are applications and websites built for the sole purpose of problem solving. Games built to teach players to overcome and outthink challenges. Zelda: Breath of the wild, has many puzzles that need solving using the techniques available to you. You have to navigate you way through the dungeons in order to reach your destination. That was just an example of a puzzle in a game. Cerein apps are designed to get users to interact to use their head. Many apps for word searches and crosswords exist. testing their vocabulary and general knowledge. Many websites like BBC bitesize, cool maths games and GCSE pod are designed with the idea of teaching and testing their users. The actual interaction itself would merely be a finger tap or a mouse click. The types have a wide range and overlap in many areas such as education and entertainment. And this is just based off problem solving. many more exist for many other skills as well.
Entertainment
Likewise, many use interaction as a form of escape, to distract from the worries of the outside world. Gaming in particular has advanced significantly in recent years. Entire digital worlds are created to emerge the player. Open world games such as Link: breath of the wild (2017) and Fallout: New Vegas are example of this. Storylines straight from movies appear round you and you play a part in what happens. You play the story rather than just watch it happen in front of you. Telltale games takes this a step further, forcing you to choose options throughout the story, making the outcome of each experience completely different, an example being the walking dead.
Virtual reality literately immerses the body and senses into the world. No longer just a controlling playing an avatar on the screen. You move your arm, so does the character. The format would be the chosen hardware of control (controller, keyboard...) and the software of what game your playing.
Communication
Interaction can be used to break down the barriers that distance sets up, regarding our communication. Types of interaction, such as social media, can bring people together from all over the world. These software's will be formatted as web browsers and applications, with the simplicity of a few button presses in order to be rewarded. An example of this would be Instagram (owned by Facebook). While Facebook has a separate service called Messenger, Instagram contains the whole package. Several companies have several different version of their own social media, all very similar to each other but completing the same task. Social media is the type while The software (Instagram) is the format. It allows for easy transfer of photos and videos, or phone calls and face timing and messages. It stops people feeling so alone in a world that is currently lock down and heavily restricted. Without this interaction people would only suffer in current times.
References
15, P.-. G., 2016. Advantages of interactive media. [Online]
Available at: http://baprmgroup15.blogspot.com/2016/06/advantages-of-interactive-media.html
[Accessed 14 January 2021].
Hallam, T., 2018. Designing purposeful interactions. [Online]
Available at: https://www.hallaminternet.com/purposeful-interaction-design/
[Accessed 14 January 2021].
McCoy, E., 2019. THE 12 BEST TYPES OF INTERACTIVE CONTENT FOR HIGHER ENGAGEMENT: INFOGRAPHICS, WIDGETS, & MORE. [Online]
Available at: https://killervisualstrategies.com/blog/best-types-interactive-content-infographics-design.html
[Accessed 14 January 2021].
Spacey, J., 2017. 12 Types of Interactive media. [Online]
Available at: https://simplicable.com/new/interactive-media
[Accessed 14 January 2021].
Wang, A. I., 2020. Dozens of studies show learning benefits of using Kahoot!. [Online]
Available at: https://kahoot.com/blog/2020/07/01/dozens-of-studies-show-learning-benefits-of-kahoot/#:~:text=improved%20classroom%20dynamics%20and%20created,teachers%20and%20students%20and%20peers.
[Accessed 14 January 2021].
Wikipedia, 2021. The Walking Dead (video game series). [Online]
Available at: https://en.wikipedia.org/wiki/The_Walking_Dead_(video_game_series)
[Accessed 14 January 2021].
ROUGH NOTES
Purpose - in essence participation, the main goal. Makes people active, not passive.
Point, example/evidence. explanation - reflection/awnser
Write about these on the Wix Page - CANT COPY AND PASTE - PLAGERISE IT (GO BACK AND WRITE MY OWN RESPONCE)


ASPECT RATIO

REFERENCES
Calculate Aspect Ratio, 2020. Aspect Ratio Calculator. [Online]
Available at: https://calculateaspectratio.com/
[Accessed 14 January 2021].
Simmonds, J., 2018. Aspect Ratio Scaling — Mobile and Tablets. [Online]
Available at: https://medium.com/the-space-ape-games-experience/aspect-ratio-scaling-mobile-and-tablets-d574ab20a943
[Accessed 14 January 2021].
Wikipedia, 2021. Aspect ratio (image). [Online]
Available at: https://en.wikipedia.org/wiki/Aspect_ratio_(image)#:~:text=The%20most%20common%20aspect%20ratios,and%2016%3A9%20(1.
[Accessed 14 January 2021].
Wikipedia, 2021. Image resolution. [Online]
Available at: https://en.wikipedia.org/wiki/Image_resolution
[Accessed 14 January 2021].
Aspect ratio: relationship between height and width. Basically how tall and wide your video is.
Whatever you are creating, it needs to fit the screens of the audience.
Make the content fit the output. Portrait or landscape is also very important? If you design portrait and they wanted landscape, full restart would be needed.
Design will stretch if the ratio is wrong, making major reductions in pixel quality - if not optimised correctly.
So for the interaction side of the project, decide what you are presenting it on. What format. Phone call, portrait (phone ratio). Landscape for an internet video...
Responsive designs
Allows you to views creation in multiple ratios for film, pc, phone, tablet... Shows you how they would come out on each format.
For example, YouTube has this feature when uploading channel art to your YouTube Channel. Wix also has this feature on the paid version.


Classic TV: 4:3
HDTV: Widened tv screens. Unlike the old TV ratio, it reflects the shape of your eye, making it more ascetically pleasing. The fact that the screen is bigger lets you see much more. Rule of 3 looks better in HD than in classic. Has a 16:9 Aspect ratio, it can also be measured in pixel measurements (used more to explain the quality of resolution - how detailed the image). In the case of an HDTV (2K) its pixel's 1920 by 1080. However, most are transitioning to 4K TV. (3940 by 2160 resolutions).
Double 2k resolution to reach 4k (Ultra HD). Increase of 3 per pixel.
1920 width and 1080 height - landscape. Reverse for Portrait.
Cinema: The main aspect ratios are 1.85:1 and (2.35:1 or 2.39:1 - rounded to 2.37:1). The ratio of cinemas have adapted and evolved overtime. Depending on the location (i.e. America) depends on the common ratio. 1.15:1 is the American standard.
Mobile and Tablets: Much more diverse with varying aspect ratios. TV has a standard set while phones constantly change depending on the size. 4:5, 2:3, 9:16,16:9 and even 1:1 9a square). Phone and tablet aspect ratios completely depend on the size of device.

JPEG vs PNG
jpeg - no transparency
peg - transparent - no background information
research difference between!
JPEG stand for joint photographic expert. while PNG stands for Portable Network Graphics. PNG's are generally larger in terms of memory and has an overall better quality than JPEG. They also allow transparency while JPEG does not. JPEG uses .jpg extension while PNG use .png extension. JPEGS are small, do not take up as much space and still retains a good quality (although not as well as the PNG). JPEG also doesn't support transparency, resulting in a white background. While JEPG is commonly used in photographs, PNG i mainly used in icon creation.
Those are the critical differences between JPEG and PNG.
PNG will be better to use in this particular task. Space isn't an issue so a downgrade in quality is not necessary. Furthermore the transparency will be necessary for the interactive interface. Background borders would only hinder the immersive experience and look out of place (almost stuck on top rather than apart of).

Parahar, M., 2019. Difference between JPEG and PNG. [Online]
Available at: https://www.tutorialspoint.com/difference-between-jpeg-and-png#:~:text=JPEG%20and%20PNG%20both%20are,is%20present%20in%20PNG%20format.&text=PNG%20uses%20lossless%20compression%20algorithm.
[Accessed 14 January 2021].
Google slides 13/1/21
Experimented Methods:
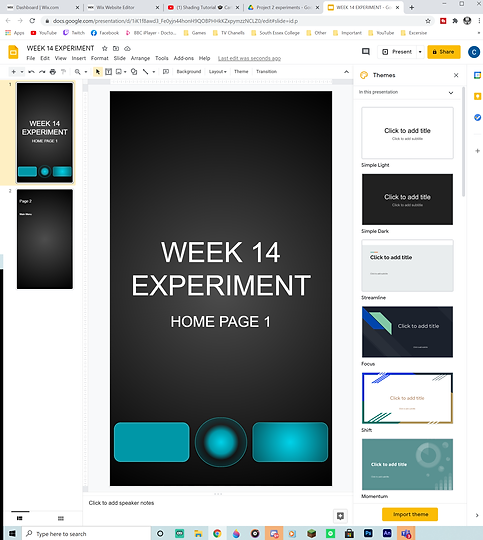
Open up Drive: Title slide - WEEK 14 EXPERIMENTATION
File - page set up - custom - convert to pixels - 1080 to 1920
Background - colour - gradient - done
Design your own Background
As much black ,white and grey as much as you want, with 1 or 2 colours. Any more and it will cause headaches - kids like bright colours. As you get older colour hurts your eyes more. Keep it consistent!
RESEARCH - How to keep same formatting when making new slides
Shape icon - insert. Fill - colour - gradient - custom
right click - link - url or slide present
copy and paste buttons (keeps it in the same place) or duplicate slide
Using images as buttons: insert - image - upload from computer (design your own!!!) or get it off the web but not for the final piece.
insert image - insert animation (while clicking image) - object animations
insert image - insert - link (how to make an image link to a website)
Reflection
b1. What areas did we use to describe interactive media?
2. Why is aspect ratio important?
3. What skills have we covered today in terms of google slides?
demonstrate and document the experiments and how im using the tools available.

GOOGLE SLIDES - MY OWN EXPERIMENTATION
ATTEMPT 1

Independent Research Ideas:
Research into interactive forms, templates, ideas... Look at other interactive products, find things what you like. apply them and adapt to your versions.
Experiment with tools and record yourself applying them. Delve into new tools. Try out new buttons and options. Experiment with software's, which is better? PowerPoint or Google Slides?
Find videos and recourses to help guide you in using these software's. Tutorials on new methods. How to for any issues. Ask people with similar experience if any issues arise.


GOOGLE SLIDES - MY OWN EXPERIMENTATION
ATTEMPT 2 - 14/1/21

The day after we was shown the methods, recorded above, I started practicing and experimenting. This particular section is on google slides, I plan to compare it to PowerPoint on a future day. I go through the method shown to me in class, my own knowledge and experiment in areas I'm not to sure on.
For a full dive into the method of certain functions, such as videos, images, audio, links, transitions, shapes/buttons, text edits, background edits, tables, views and page layout, click the videos on the right.
They go into more detail and show my process of working out and overcoming any issues - completely uncut and unedited (about 30 minutes each).
Reflective Cycle
The methods are all taken care off, you can visually see what I did in the videos on the right. However that still leaves me with the other areas.
It felt very easy to use. I was able to cover most functions within an hour. It wasn't any headaches unlike using other new software's for the 1st time (animate...).
Compared to my own experience in PowerPoint throughout the years, Slides was relative simple.
Even the small errors I had were fixed with very little effort. The table (after pasting on every slide) could be removed by going into the master slide view. Audio had to be imported in from the drive (a minor inconvenience) and resulted in a default audio icon. Turns out images can be placed on top, allowing me for my own custom symbols to be made. They can also automatically play without any instruction from the user. Images can be set as backgrounds or just placed on top. Aspect ratio would be the biggest worry here. When the presentation ratio was changed it warped all the slides. I would have to set my presentation to the desired ratio at the start to not repeat this. Any custom images/videos I make I will need to consider ratios especially. A landscape internet video on a portrait phone wont look as nice as a wide screen.
If I was to do this exact exercise again, I would spend more time in the individual tools and see what other applications are possible. I found out how transitions work but didn't experiment that much in terms of variety and speed. Other tools are also available although not as used as the ones I done today, they need to be experimented with.
Both videos recorded by me and uploaded to my channel - I own all the rights to these 2 videos and therefore don't have to reference.
The 1st video goes through mainly what was learnt in lesson and the methods I was introduced to. It also goes into the knowledge I know regarding Google Slides. Information such as text edits, text box edits, shapes, link, animations/transitions, slide edits, images from internet and my pc, background edits and more.
This is part 2 of my experimentation in Google Slides. It delves into areas I'm not as familiar at such as videos, audio, view options (master view especially), further transition experiments (slides, images and buttons), tables, further image experiments and possible ideas of application.
Positively it was very easy to use but besides that I don't have that many good things to mention. As I said above, it is very simple in comparison to other software's that do the same function (like PowerPoint). I could figure out how most of the important tools worked in a single sitting. What I would have to do now is experiment in application and format. Try to use these tools with purpose, see what combinations work better than others. I also want to do a comparison with PowerPoint to see which software will be more beneficial to use. I need to research possible interactive experience to mimic in these software's. Something like VR would be too difficult and impossible with my current hardware. A basic game would be possible, although lacking in what makes games great for interactive experiences to begin with. A phone is another way I could present my information. A PC would be another good way (almost like secret classified files). TV broadcasts, interviews, phone calls, witness accounts. I need to do some more research on what others have done.
I don't have too many negatives either. It's very bland if anything, does it's job and that's it. it's simplicity could be good or bad depending on your goal. When importing images as background, I had no control once it was in slides. Audio being imported from drive only is annoying personally, but just a small inconvenience. What's clear is that I'm going to have to rely on YouTube for any video uploads. I want to see if I can do videos in the background while still having the interactive features of the Slide on top. This means other software's I use, such as Stream labs OBS and Sony Vegas 14 will be essential in video recording and editing. I can even use Vegas to edit audio, although I know from experience the audio quality is poor exported from Vegas alone.
TO DO LIST:
Experimentation with digital techniques DO MORE
1. think about interactive products only, what is it going to be?
2. Is there a theme? - combine themes to make something new (combination theme).
3. what feelings/emotions do you want to communicate
how can they be visualised
how can they be heard
mindmap
Interactive Design Principles - 20/1, 21/1
1. Words
The words that the user sees. Use them well as too many will put off the user. We now live in the age of icons (using symbols instead of words). Consider your audience. Make each word used convey meaning.
e.g. Websites (use simple effective words). Almost every website has words on it. Google search, YouTube and the South Essex College site are all examples. Although most rely on either drop down menus or icons/images to interact. Keep your font and word colour consistent, otherwise it will look like a jumbled mess.
Example of this would be TV advertisements, Most Websites and even some video games.
2. Visual Representation
Basically anything that you can see that isn't a word. Typography, photos, icons, diagrams and images are included in this. Easiest way to grab people attention. If they are not interested in the image, chance are they wont want to see any more of it.
An example of this would be the Thumbnails on YouTube, the Screenshots on this very Wix site and the Facebook feed.
Too many images all clustered together with inconsistent spacing will put off your audience.
Example of visuals would be box art on movies, photo gallery's and websites.
3. Physical Objects/Space
All about the spacing of your images and other features. They wont have the same impact if they are put in the wrong place. Bad web design will deter viewers, as it will be much harder to interact with. Although depending on the hardware (e.g. phone, pc...) the website will resize, so the design must take this into account.
4. Time
This is the idea that the media (in this case websites) will change overtime. Motion and sound play a major role in interaction. It is also the amount of time the user spends interacting in the 1st place. Much information means interactions will slow down, due to the sheer amount of info to be processed at once (explained further in Hicks Law).
5. Behaviour
A combination of all four of the previously discussed parts of interaction. This is analysis how to user uses the interactive media. How does the above influence how the user interacts. The amount of time spent interacting is another indicator of whether your design is successful or not.
6. Hicks Law
Explanation of the principle
Relationship between the number of stimulus at a given time and the individuals reaction time to any given one. The more stimulus present, the longer it will take for the user to decide which one to interact with first. People take time with their choices (especially when bombarded with options). This results in them working when they don't want to.
Less likely to be impulsive when every decision is made deliberately.
We want to simplify the process to speed things up, but not get rid of it entirely.
Hicks Law Equation
RT=a+blog2(n)
Understanding of it
RT is reaction time, (n) is the no of stimuluses present, "a" and "b" are constants that depend on the task (specifically the conditions).
If you reduce the number of stimulus (n), you get a faster decision. However, if the user had already made up their mind before the stimulus was shown, it will be much less time to react.
3 examples
Amazon, 1 click and you can buy it. Deliberately simple to encourage impulsive buying.
Yu-Gi-Oh Dual Link (gatcha Games). Designed for the East, deliberately a tonne of information on the interface.
The number of button s and knobs ion your microwave is influenced by Hicks law.
2 Minute Presentation
On google slides:
7. Fitts Law
Basically the bigger the object is, the faster a person can point it out. We can use this when designing buttons and menus, icons and images. We can use size to controls the audiences attention. Make the image of the site stand out using size, a centrepiece per say. If you want to show where to go next, make the buttons bigger.
8. Teslers Law
The fact that every application will have a certain level of complexity. It will get to a point where it can no longer simplify down. Once fully simplified, it would be up to the designer to make it more complex. Most of the work is normally backstage, hidden from the user. This means that it will be simpler and easier to navigate, which brings in Hicks Law as well.
References
Smith, A., 2020. A Brief Introduction To Interaction Design. [Online]
Available at: https://usabilitygeek.com/introduction-interaction-design/
[Accessed 21 January 2021].
Soegaard, M., 2020. Hick’s Law: Making the choice easier for users. [Online]
Available at: https://www.interaction-design.org/literature/article/hick-s-law-making-the-choice-easier-for-users
[Accessed 20 January 2021].


Interactive Design BAD EXAMPLES - 20/1, 21/1
BAD DESIGN 1
Example site: https://jamilin.com/
Far too many words, making it very hard to navigate (1D). Most use icons now days to simplify the layout and improve space (3D). Too many colours, colour is not consistent in any form. Every part is trying to be eye-catching, making it a complete visual mess (2D).
Completely packed, far too intense. Website looks like it was designed in the early 2000s/late 90s, hasn't aged well or been updated for present day use (4D).


These 2 website I will be doing together. The site on the left will be referred as 'Mario' and the one on the right will be referred as 'shopping'. Shopping has as much information as it can packed into almost every space available. While Mario has very inconsistent spacing instead, with each area being a different size. Once again, both have horrible colour schemes (especially Mario). Mario's colour scheme is consistent but hurts the eyes. It uses the exact opposite colour (complimentary colours) and in doing so makes it very hard top look at. Shopping is essentially a walking advert, basically a newspaper format. In doing so the majority of colour is inconsistent and varies wildly depending on where you look. Both different issues in terms of visuals but it creates the same outcome of a negative experience. These factors will severely reduce time spent on the site by the user.
I reckon the purpose of the Mario site is to be deliberately bad, and it achieves it well (basically for entertainment). Where as the shopping site is built to seel you goods, achieving this horribly. If it is for commercial use them people wont stick around on the webpage due to how hard it is to navigate.

BAD DESIGN 3: The Worlds Worst Website
https://www.theworldsworstwebsiteever.com/
1D. Words are everywhere and to add insult to injury, all in completely different fonts, sizes and colour. No consistency what so ever. Nailed its target audience though. They know no one will take it seriously so they have deliberately gone over the top in their language choice and almost every formatting option. The very meaning is to be chaotic.
2D. Once again, an overload of images, typography, gifs and many more all cramped together in a small space. Makes it difficult to look at as you attention is torn all over the place. Physical object spacing will also differ for devices. But even then (on a PC screen) many boxes go off the normal viewing page, breaking many of the most basic website formatting rules.
3D. Where we put the info/visual. Answer = EVERYWHERE. No rhyme or reason to locations. Interactive links are located everywhere. you almost stumble across it.
4D. Time it takes to interact with the product. Very cluttered. Due to the huge mis order of info, more time is taken just tracking down the links.
5D. Overall interaction (taking the 4 as a whole). Overwhelms user. So much going on, long term use hurts the head physically. Pain to navigate. First reaction was a mixture of amazement and shock.
Overall Judgement, audience, purpose (good or bad):
Ironically bad, for entertainment purposes is my guess. Achieved this by highlighting MANY bad design flaws and deliberately creating a bad website, hence the "The worlds worst website ever". Target audience for those looking for a laugh. Also educational purposes in what NOT to do in website design - provides list of everything wrong.
HELP GUIDE - https://usabilitygeek.com/introduction-interaction-design/

Interactive Design MINDMAP - Themes, Hardware and Style - PLANNING EVDENCE - 20/1


These mind maps were used to help form and generate ideas. It the building work of an idea, the foundation. Discover one approach and delve deeper into it, explore all the ideas that branch off it. This is a highly effective it seems for generating new ideas. Honestly my one issue is how messy my writing is after months of typing. If others try and read it they will have a difficult time. It served its purpose well and in doing so, I have decided on the format of my interaction and a theme to explore using it. If I was to do this again I would either use a bigger piece of paper or do it online for more space. The space of the paper was the biggest limiting factor here. Furthermore, due to it being paper and the method of transfer, the image quality came out poor. I took a photo and uploaded it to discord, then downloaded it onto the pc and onto wix. In doing so, the image quality dropped. I shall have to find a different wat of doing it in the future.

Interactive Design MOODBOARD - 20/1

The mind map was to generate ideas on the theme, interactive hardware style, emotion and overall direction of the interaction. This particular mood board play on the horror elements and explores black and white media. The very aim of my character is to make him an uncontrollable force of danger at the start. My playing into the horror elements, I can remove any humanity left in the character design. Make the audience terrified of him like in the 3rd character design reaction.
Horror works on either being unstoppable, inhuman and in many cases, not know the true extend of the threat. Some of the best horrors completely hide their monster until the end. I want to cover up the character for the 1st part and finish the introduction in his reveal. The as the story progresses from there start introducing more human elements, flaws, raw emotion, physical human features.... I can take direct inspiration from the horror classics in terms of style choice (such as Frankenstein, Dracula and Jekyll and Hyde). Old visuals and sound, the graininess to hide more of the scene.
I could then have the media transition to a modern day computer to play into a different, more up to date style. Encrypted files, hacking, security footage, witness reports and online video. The black and white style will emphasise any colour shown, exaggerating any of their symbolic traits. I intend to use red to paint the scene over the top of the base black and white.
Conveying Emotion - ROUGH NOTES - 20/1
Emotion: - HARDWARE
How to convey?
Colour: grainy like an old style tv, make it look almost like a horror classic. play into the stereotypes. grainy black and white, makes threat hard to see. video would break on fast scenes. bad quality security cameras, keep threat hidden to the end, show it from his perspective.
Transition to live news, show its not just a movie, make quality clearly, more organised and formal, cover up explicit images (blood/violence). witness reports. video footage.
transition outwards, gov files.
Symbols: Any religious symbols? any philosophies? What does the mask represent, what does the damage represent? A loss of shape, lack of identity, loose the human traits. Make him a monster on the battlefield. Show his ruthlessness, his joy, his arrogance and efficiently.
Motion: keep character hidden. Fast movement, mere glimpses. Fast, powerful. Create evidences of impact and destruction. An unstoppable force of chaos and strength.
twitches, clear madness, unpredictable, uncontrollable. slow down after each elimination, make him relish in it, enjoy the hunt and the fear of others.
Emotion: - SCENE
How to convey?
Colour: keep black and white, old school horror. Very minimal colour scheme to emphasise any colour on show. Keep blood red (signifies violence, danger, wrath, evil...). Paint the scene in the enemies left overs.
Symbols: Any religious symbols? any philosophies? What does the mask represent, what does the damage represent? A loss of shape, lack of identity, loose the human traits. Make him a monster on the battlefield. Show his ruthlessness, his joy, his arrogance and efficiently.
Motion: keep character hidden. Fast movement, mere glimpses. Fast, powerful. Create evidences of impact and destruction. An unstoppable force of chaos and strength.
twitches, clear madness, unpredictable, uncontrollable. slow down after each elimination, make him relish in it, enjoy the hunt and the fear of others.

Photoshop Button Experiment
Issue 1 - Black Border

This is experimentation with creating custom buttons in word and using them in PowerPoint. The main method is to use the shape tool for the buttons general shape. Edit it through fx. Use the timeline to animate any moving features on top the button and finally export it as a gif.
The particular button on the left was my 1st attempt. The issue was I got this black ring on the outside. This would of carried over through the rest of my method if not fixed now. Eventually I solved this problem by making the stroke button 0 pixels, basically getting rid of any traces of a border.
It was a small issue that had a simple fix. Overall I felt basically neutral about what was happening. It was too early for any satisfaction and no major issues as of yet.
Issue 2 - FX - 27/1


I have (very briefly) gone over the method above, this is purely the next small issue I had with it. We were instructed to add the 'bevel @ emboss' fx to our button. Using this we can replicate the texture of wood, metal, plastic and more by changing the 'technique'. The style was the issue here. We were told to use the 'emboss' style. However this resulted in a white outer ring (which would carry over through our export). To get rid of this, I experimented with styles until I found the style 'inner bevel'. This meant that the ring was inside rather than a shadow outside. Depth changed the intensity of the light and shadow and the size the width of the new inner ring.
Fx is a tool I have experimented with in the past, although this particular use of it is new. The graph seen in the top right of the screenshot is the gloss Contour, a way to distribute the dark and light areas of the ring. I could use this method in my own button design for my interactive. A pc would have a mouse, I could create a button for the curser. An old style TV would rely on buttons on the side to operate, including channel, volume and signal.


The orange button is the button that the teacher used as an example through lesson, in which I take no credit for any of his work. The blue and red button is my work alone and shows my own version of his method.

Timeline Experimentation - 27/1


The timeline is a new feature in photoshop, 1 I would of had no prior experience using. Many of the tools used today are new and need further experimentation, I have had a mere introduction. My 1st use of timeline somehow turned into a video format, which was not the task. However by clicking the 3 dotes in the bottom left corner solved this. So instead of dragging the still frame to judge the timing in the vid version (similar to how the Sony Vegas timeline works), you just add a new blank frame and alter the layers appearing instead. Timing is established using the numbers below the image. I first attempted to use a '0.03' delay, which resulted in my picture moving far too fast. Having it on a 0.00 delay sets it to a default speed, which in this case was much more manageable than my previous button (seen below).
Although a software like adobe animate might be better suited for the actual animation. Photoshop would be a good way to plan out and create a first draft (an animatic) of my introduction idea. Although this is more for the visual rather than the interactive, its a technique that could be transferred over. Use still frames/shots to tell my story. import them into animate and draw the in-betweens.
Issue 3 - Export Experimentation - 27/1

Now exporting the button itself had a whole slew of issues. It is necessary to actually use what I created and the method varies depending on the software used.
For example. My 1st attempt at exporting got the still button on the right. I went file, export, export as, gif and saved it. Although it resulted in a still image instead. For photoshop, I need to click 'save for web (Legacy)' as shown in the screenshot below. Furthermore I then need to format it as a 'HTML and images' for it to work. Then a 'images' folder will be created and it will automatically export there.
Now if you was using Photopea, the free version of Photoshop, then the method changes yet again. Each folder is a frame (as there is no timeline). The frames are numbered in the format shown above. The number is the speed (or delay) of each frame. I used photoshop in my own experimentation so I screenshotted the teachers example to show the export methods. I take no credit in any of his work and merely use it as an example to explain the process of exporting.
This was a headache to fix. I will have to pay close attention when using this method, 1 wrong click will ruin the export. It will be necessary when creating my own buttons and will definitely be used to some extend in my own interactive.


ATTEMPT 2 - 27/1
After the lesson, where we was introduced to the methods. I then done another attempt. This time I used a different shape from the shape tool. I finetuned the fx to not get any outside shadow, created the desired amount of inner shadow and light, adjusted the width of the ring and used the timeline to create the blood effect.
I also found how to adjust the colour after creating the shape, the method to this can be seen in my later experimentation videos below. Using the same frame method as before and paying close attention to the export method, I created the button on the left.
This is the next step up. I was introduced to it. I have now made 2 versions of a button using it. The next step is to experiment further with the button creation (after some key research into what buttons are required). But first I need to show how to use these buttons in PowerPoint itself, how they will be useful.
The successful export of the 1st attempt button can be seen above.

PowerPoint Button Experimentation 1.0 - 27/1

Welcome to my 1st official experimentation with PowerPoint. I said much earlier how I was going to compare it to google slides. Further down, there is a video showing my own individual experimentation and reaction to any issues that arise, as well as a brief comparison between PowerPoint and Slides.
The buttons can be transferred into PowerPoint by going insert, picture, browse and clicking the button you want. Although I found in experimentation it is much quicker to just drag the button onto the slide you want.
However, certain issues occurred when importing the button. For starters, the outer shadow (created by the emboss filter) stands out as a white ring, which was not the original intent. If I want to have a shadow (or a glow) on my buttons, it would be easier to alter it in PowerPoint itself (shown in my experimentation video).
However, the 2nd button shows what happens if you have the inner bevel instead. Suddenly that shadow/ring is no longer present. This information is going to be vital for my interactive. I need the buttons to be clean when importing into PowerPoint.


Although another issue happened when importing. Its difficult to see in the screenshots but a small white outline formed round the button when adding a background. Even know the background was set to transparent in Photoshop, there seemed to be some interference with the PowerPoint background. The way I fixed this was to find the exact RGB value of background and replicate those settings in the button creation. This eliminated my problem and I was able to progress from there.
Once again, the orange button belonged to the class example, I take no credit in any image involving it. Although the blue and red button is my own, having the same issue as the one shown in lesson.

PowerPoint Experiment 1.5 - 27/1
This was a quick experiment in replicating the phone layout in PowerPoint. I found it much harder to do than in slides due to the complexity of the software. I ended up asking for help from other students to get the aspect ratio edit in PowerPoint. After I used an external site to convert pixels into cm (the format of PowerPoint).
The background was simple, use a gradient to get the blackness of the screen with a glow coming from the video. The idea was to make it look like a YouTube video. I then imported one of my own animation gifs to act as a video. The plan was when you clicked the YouTube button it would play the video (a gif on a separate slide). However, I had a further issue with getting the button to link you to the right place (requiring further experimentation to fix as of writing this).

Due to the creating of this being in lesson time, I had to drop this experiment to carry on with the lesson task. However there will be another attempt in the future. I need to keep trying to replicate known formats in PowerPoint. The only way to improve is to experiment more, research into any issues, evaluate what I did and try again.
Avenir Light is a clean and stylish font favored by designers. It's easy on the eyes and a great go to font for titles, paragraphs & more.


PowerPoint Experiment 2.0 - Text, Backgrounds, animation and shapes - 27/1
In this video, I experiment with many PowerPoint tools. Word manipulation, background and design Edits, Shape Manipulation and a brief introduction into animation features.
I need to look into the tools of PowerPoint further. This video basically covered what I could remember off the top of my head. There wont be as much writing since the video explains most of it.
There are still many key areas that I am missing. I need to research into how to jump between slides using buttons and links to external sites, as well as adding music and sound effects.
I also want to experiment with the 'animation' menu more. I barely scratched the surface - there is big potential in what I can do with it.
I did notice that the video has a big issue regarding audio quality. It is an issue I will need to look into, otherwise it will negatively affect my documentation of work.
Flowchart - Interactive Planning - 27/1


Now, before I actually start producing my slides, I need plan plan out how my audience will interact with it - how they will navigate from 1 area to another. This needs to take into account all the laws (and 1D to 5D) research way above. These screenshots merely highlight the methods. The 1st method of planning is the paper way. Where I manually draw connections between boxes (slides) to say how they move from each other. The paper method is hard to read and extremely rough (lots of human error present). Although it is the quickest of the 3 present and is a good way to throw your ideas in the open fast. I reckon this method will be useful in tangent with 1 of the other 2 below. I explain further in the video below as well.

The other 2 used Word to create the chart. The coloured 1 consists of inserting shapes manually into word and individually writing out each section. It is much more easy to read and present than the paper way but much longer to produce. It does give you the most control in regards to editing and placement.
The other methods work by creating a Histogram, which automatically sorts out placement and links, to plan out the interactive. Although much quicker than the shape method, it restricts the amount of creative freedom available. You are stuck to a set template with set commands. Once again, both are explained in more detail in the video on the right.

123, T. R., 2021. lesson breakdown, Interaction Planning (L16), volume increased vid. [Online]
Available at: https://www.youtube.com/watch?v=H3cJAgAMXm8
[Accessed 27 January 2021].
What I noticed in the PowerPoint video above was the major lack of Nosie in the video. It must of been an issue with my settings on the day but all recorded vids on the 27th came out quiet.
I knew this video would be just as affected, so here's how I solved my audio issue. I pasted the video into Sony Vegas and increased the gain to max. It would loose quality in the sound but that's better than no sound at all. Even now it is still quiet but it can at least be heard now. I plan to go into my stream labs settings at do some video tests to see what the overall cause of this was.

28TH JAN 2021 - MY PLANNING INTERACTIVE
This is all my interactive work for the 28th of Jan 2021. So far I would of spent 3 hours writing, uploading videos, reference and editing the layout of all the work from the 27th.
Now I will be planning my own interactive, experimenting more with PowerPoint and may even get my draft started of my interactive.
Although the 1st thing I needed to do was fix my audio quality. Yesterday, any recordings I did came out really quiet. So I went into my OBS and double checked the settings. I then had a look over my mic settings and conducted a test. Somehow, without changing anything except the location of the mic, my audio was back to normal (see the vid on the right). This means I will be able to easily document my processes and work as I go along. I also want to start a digital diary entry, documenting what I done each day. This blog style recordings will only be experimented with the later half of project 2, although if successful I will use it to a more refined form in my final project.
123, T. R., 2021. Mic Test 28,1. [Online]
Available at: https://www.youtube.com/watch?v=f_352IDwHRc
[Accessed 28 January 2021].
Film Example 1 - The 13th Guest (1932)

IMDB, 2021. The Thirteenth Guest (1932). [Online]
Available at: https://www.imdb.com/title/tt0023583/
[Accessed 28 January 2021].
one4allfour1, 2015. 1932 MYSTERY The Thirteenth Guest Stars GINGER ROGERS Classic Movie Film Free Full Length Old Movie. [Online]
Available at: https://www.youtube.com/watch?v=1rHd_bQPvJU&list=PL-MZfgiijR7eN3qP7u82yeODlTPuEHv96&index=2
[Accessed 28 January 2021].
Wikipedia, 2021. The Thirteenth Guest. [Online]
Available at: https://en.wikipedia.org/wiki/The_Thirteenth_Guest
[Accessed 28 January 2021].
I have already said in my mood board how I want to take inspiration from the old horror films. The current interactive idea is to split it into 2 halves. 1 with an old 30s -40s era TV where I could show animations inspired by the era, news broadcasts, radio telegrams, government announcements...
And the other a modern day PC (classified government edition) where interviews, classified files, military reports and witness accounts are stored.
Heck, maybe even public (or taken down) YouTube videos from the character himself. This could give the idea of being hacked part way through, introducing the character introduction... Security camera footage.
The purpose of watching this film is to understand the media of the time. What are the visuals like, what is the audio like, aspect ratio, colour (or lack off) and many other traits that create this format. The interactive part would be the tv (the hardware) itself and how the viewer interacts with it (buttons for example).
The technical specifications of this film are screenshotted below from the top source on the left. Specification such as the aspect ratio, sound mix and colour can be replicated in my own interaction and is extremely valuable to know. I intend to add these specs to help in the creation of the old style tv bit of my interaction. What I need to do now is to research the actual hardware of choice and possible some more exam-les of films round the 30s/40s era.


Radio Example 1 - D DAY (6 June 1944)

BBC News, 2019. D-Day as the BBC reported it on radio news. [Online]
Available at: https://www.bbc.co.uk/news/av/uk-48525818
[Accessed 28 January 2021].
This is my 1st example of radio during the time era of choice. Although the actual hardware is not present, an audio file of the radio broadcast of D-day is kept on the BBC website. This is my 1st example and the closest I can get to what radio was like during the time. Although this belongs more in the audio section, it was still my inspiration to include a radio in my interactive in the 1st place. What I need to do now is plan out how I will use a radio and tv in my interactive. And I also need to research into the hardware of each system used.
123, T. R., 2021. Start of the day 28th - DONE and TO DO. [Online]
Available at: https://www.youtube.com/watch?v=R4A_LrHn6Pk
[Accessed 28 Jan 2021].
Interactive Plan Attempt 1-3, 28th - 30th
This is a new method I am using to help document my work and progress. I would of used uploaded videos from my YouTube channel 'TOXIC RAVEN 123' in the past, now I'm making the most of it. From the 28th, I have essentially started a digital diary of my progress, covering what I done on the day before and what I plan to do on the day of recording.
This was because I have been writing too much since the start of the course and I need to fix it. It is a problem. Quality is lost through quantity. Since Project 1, task 2; I have made an effort to cut down on the written side. However the problem is still present so here is my next attempt at a solution. I will document my work with a mix of written and video evidence. The video will briefly outline what's good, not good. What I did, how I feel and my next plan of action (a short reflective cycle).
All the 'blogs' will remain unlisted on my channel for those viewing the website (with it being the only access point). I shall reflect back on these vlogs after trying out this new method everyday for a week.

123, T. R., 2021. 29th visual explain, hiarchie pt 1, attempts 1 - 3. [Online]
Available at: https://www.youtube.com/watch?v=csZ5EnCx5FM
[Accessed 31 Jan 2021].


Now I would of briefly covered this in my 29th video update called '29th visual explain, hiarchie pt 1, attempts 1 - 3'. However I still need to write about it in order to give a proper reflection. As said in the video, my 1st attempt at my interactive plan (all flowcharts by the way) was done on accident. When we were shown the method in class I started to try and plan out my own flowchart when given 10 minutes to do our own. Turns out I mis interpreted the task, as I was only supposed to do a copy of the existing chart example. This mistake was the foundation of all the flowcharts to come and without it my interactive would look very different as a result.
Attempt 2 was created soon after the lesson. This was essentially a polished version of the 1st attempt, what I intended it to look like given the time. Positively, I extended the hardware from 2 routes to 3 - given me much more creative freedom of what I could create. Many new features were added in such as google (PC), secret government channels (TV) and the addition of the radio.
However, many of the negative traits from the 1st still transferred over from the 2nd. A flaw amongst every paper flowchart I created was spacing and visibility. When created digitally, you have the option to drag and move the information to the layout of your choice. However paper is permanent. Once the pen touches the paper, there is no moving it. This is especially tricky when your basically making it up as you go along, making spacing very inconsistent. This wasn't so much an issue in attempt 1 due to the lack of content. However 2 to 5 suffer from this problem greatly.

So after I was done with my PC for the day (as I would of spent easily 6+ hours on it), I decided to go outside. My eyes are under constant strain looking at screens for 2 long so I changed the scenery to fix this. I sat down on a bench tell nightfall and drew flowcharts in my small book (attempt 2 and 3). This was honestly much better for my own mental health as well as the project. I done multiple pages of notes kicking around possible ideas and making a list of what to create. Then I finally made attempt 3.
This was much cleaner than attempt 2 in terms of eligibility. My writing is the main problem of this, which wont be solved tell attempt 4 onward. This time I started planning out the slides, how it will move between them and how many buttons that will be required (b1b would been slide 1, button 2...). It was a lot more practical and delved into how it will work rather than simply what content shall I include. It did also highlight a major issue.
Positively it made me start thinking of the story I would tell as the viewer interacts with it. What do I show them first. How will I feed them the info. The interactive principles and laws would play a major roll in this. No one want to see a wall of text (sorry for those on my wix site).
With 3 choices of hardware, the viewer could go down any one of them 1st. With the PC holding the main story at the time (if selected first) it could lead to the other 2 hardware's being skipped altogether. Vital sources of information would be completely missed.
Furthermore, this is assuming the viewer actually follows the buttons. They also wouldn't be used to an old tv and even less so the radio. The unfamiliarity with old technology could mean they don't know how to interact with it and in turn start randomly clicking. If they miss click, then they would be sent to the next slide by number. It would throw off their location and jeopardise the entire experience. I would have to plan my slides in a way that would keep them moving forward, even if they ignored all the prompts.
So the plan would be to address these major flaws listed above. Attempt 4 and 5 will need to hold the same foundation as the first 3 attempts while adapting to solve the errors.
ATTEMPT 4, 30th
123, T. R., 2021. attempt 4 hierachie creation and a5 plan - interaction project 2 year 1. [Online]
Available at: https://www.youtube.com/watch?v=xLnesD94Rk0
[Accessed 31 Jan 2021].

The 30th video blog is over an hour long and shows the creation of attempt 4 flowchart and the plan of the 5th. It shows my 1st real experimentation with hierarchies and the birth of the format of attempt 5. My mind set and my feelings were all recorded as they arrived, a much needed benefit over the wall of text saying how I felt.
In my honest opinion, I didn't think the hierarchy method would work in word. I had some issues with it at the start but got much better at navigating the tools as it went along, overcoming minor obstacles along the way. Doing it digitally made it much more visible and way easier to present compared to previously.
However, I was still limited by the format and its uses. I have already explained my feelings and methods in the video. I was restricted to the promotion/demotion tools and the automatic sizing.
So its time I experiment with the final flowchart method, the shape tool.
ATTEMPT 5 (Final Copy) - 30th, 31st


This is the final draft of the flowchart. This is result of all my previous experimentation and research. Because of the restriction placed upon my in the hierarchy structure. I decided to use shapes instead. All my attempts can be seen on the left.
The 1st image was just getting the basic structure. Getting the paper plan in a digital format. It made it much easier to follow and enabled the most amount of freedom in terms of editing.
After I labelled all the slides and starting altering the details.
The 1st issue was the one known way back in attempt 3. I tried to address it in attempt 4 (watch the video) and failed. This is my 2nd try at fixing the 3 split issue. I want to make it so the view navigates the radio and TV before accessing the PC. It was set up in such a way that the pc could only be accessed by going back from the tv. There would a good chance the viewer never finds this, leading to frustration and poor design.
So I dealt with this by making both back up to the 2nd options menu, an identical copy to the 1st with the exception of the pc being a playable option. The next issue comes with the idea of the viewer missing the button. If they stop following the buttons it will mess up the entire interactive.
Further research and asking, after the creation of the draft PowerPoint, lead me to find out that automatic slide click could be disabled. This could be an option when completing the real thing later down the line (future plan).
In the meantime. I came up with the solution of adding extra slides at specific points to save the viewer if they mis-click.
The 3rd issue came down to the numbering of the slides. If they were just to click randomly, they would be thrown from 1 transition into another ( a complete break of flow). At this point, most elements were set up specifically so that even auto clicking they will get to the desired end route - except for this bit.
Although a solution was not found in the creation of the flowchart, I was able to find a way in the creation of the 1st draft itself.
Overall, I am happy with how my flowchart interactive plan turned out. It tested my problem solving skills at many points in creation, which |I was able to solve most. Positively, it is much clearer than previous attempts. It flows from slide to slide and the route now contains purpose. A story with information for the viewer to discover.
Negatives would be the inconsistent spacing of the chart, the limited explanation into buttons and the fact that this plan was only loosely used in the draft itself. This flowchart shows 25 slides at the end of creation, while the 1st draft consists of 40 slides overall.
If I was to do this again, I would add an extra page explaining into detail, the process of how each function would operate and possible ideas behind it.
My next step would be to explain the |PowerPoint draft, get some feedback, use it to improve my interactive work, find some more examples to help the design and start crafting the custom elements needed (animations, buttons, images...).

PowerPoint Draft - Button Experiment - 31st
The 31st video blog is on the right and explains everything I done on the 30th, as well as what I plan to do today on the 31st. The plan is written up so the 31st was spent creating the 1st draft of the PowerPoint. Overall I had a lot of fun. I many many small changes to the format as I went along, increasing the slides from 25 to 40. The content is all still present, just the layout was changed. The buttons and transitions were replace with basic shapes atm. I was just testing the action buttons and trying to make it flow. The custom designs still have to be made.
At least doing a draft I now know how much I need to produce in order to get it working.
I also sent 4 emails out, 3 to students and 1 to the tutor looking for early feedback. The issue is that most of the content isn't made yet. So the very functions exist but not the content it leads to. This meant what little feedback I got back was shallow. The only bit I got is in the video on the right. They brought up spelling and was confused by the master slide section at the end, saying it don't work.
Although going back into the PowerPoint myself I found no issues with the master slide.
What I plan to do next is to start producing content for the interactive. To get a few concept pieces for the photoreal, how the option menu will look and the front interface for the tv, radio and pc. Overall I am happy with the result. I have succeeded in my task list set on the 28th, I have started looking at existing products (old radio broadcasts and old films) although much more work needs to go into this. The flowcharts/mind map ideas were complete to a good standard and went through many alterations. Even the PowerPoint strayed from the final flowchart for better practicality.
A first draft of my interactive was made and feedback (although extremely limited) was gathered.
A to do list of all the stuff I need to make for it has been made and I have just over 5 weeks to complete it.
123, T. R., 2021. 2nd blog, character 4 expain, what i did on the 1st. [Online]
Available at: https://www.youtube.com/watch?v=vFU53qfIIqw
[Accessed 4 February 2021].
123, T. R., 2021. start of 31st. [Online]
Available at: https://www.youtube.com/watch?v=MGpooSW-5-Q
[Accessed 31 Jan 2021].
123, T. R., 2021. charlie feedback - interactive draft 1. [Online]
Available at: https://www.youtube.com/watch?v=u45MS5NcECU
[Accessed 31 January 2021].


INTERACTIVE POWERPOINT DRAFT 1
This was the main video I used to learn how to use action buttons. Because my draft's main role was experimenting with action buttons to learn slide navigation, it was key for me to understand how they worked.
Using this video, I was able to create buttons to allow my flowchart to come to success. My 1 critisism with thisd would be the sheer simplisity. There is probably much more the action button can do and was not covered. It will be down tome to exp
GCFLearnFree.org, 2016. PowerPoint: Action Buttons. [Online]
Available at: https://www.youtube.com/watch?v=K_ovmy4OiQ0
[Accessed 31 January 2021].
Radio Research and Experimentation - 3/2, 4/2
After the lesson on Thursday the 3rd of February, I was given multiple pieces of feedback from my tutor Adam. He inspected my website and I got some useful tips for my PowerPoint draft. I need to add some visual representation to the slides to give a better idea of the final product. He also gave me some questions to think about like what the purpose, what affect do I want to have on the audience, what's the theme and how to I implement it into my interactive. So I got to work...


This whole section is on the radio interface. Research in this area will be key to plan out how the radio selection and main interface will work. So the first thing I did is comprise a mood board. Everything from radio examples, surfaces, textures and individual parts are present. This is to get me an idea of the hardware and the interface of the times. It also gave me my 1st ideas of how to take it further. It was invaluable as a starting point. As far as I felt, I was satisfied but it was still too early to tell how well my research would go. If I was to improve it I would get more examples of radios form the 50s and onwards (to go with the 20s-40s era present).
It gave me a wide range of examples to look into and where to start my research going forward. The rough notes and references are in the word document below - what I took at the time of research.
Rough Notes of Radio Research - 3/2


History of the Radio - 3/2, 4/2

Available at: https://genevahistoricalsociety.com/recreation/radio-in-the-1920s/#:~:text=Radio%20historians%20generally%20agree%20that,KDKA%20out%20of%20Pittsburg%2C%20PA.&text=Between%201923%20and%201930%20fully,listen%20to%20nightly%20entertainment%20broadcasts.
[Accessed 3 February 2021].
Wood, J., 2014. History of the Radio:. [Online]
Available at: https://www.techwholesale.com/history-of-the-radio.html
[Accessed 3 February 2021].
Originally it was used during WW1 to communicate with British ships. Although it wasn't very clear so Morse Code was still the primary communication method. However it was clear the radio had some major benefits and quickly improved as a result.
The 1920s was the boom of the radio. It was the 1st time they became available to the public for private use. The 1st radio stations begun to surface (the KDKA and the BBC in 1922). AT@T was the dominant station and the 1st to release a radio advertisement in 1923. CNN and CBS were created in response to its dominance in the late 20s.
The sudden burst in popularity in radios meant that there was little to no control over the airwaves. KDKA was the first station in 1920 and was the standard for all other radio stations. But due to the lack of control, shows would get interrupted midway as many time slots overlapped.
The government didn't step in tell 1926 with the 'Federal Radio Commission (1926) later organized with the Radio Act of 1927. This act became the Communications Act after television became popular.' according to Geneva Historical Society.
The radio on the left is an example of 1920s radio, very boxy was my 1st impression. Although there seems to be 2 types of radio at the time. The style of the left and the huge "crate like" style of radio below.
Philco Model 20 (1930) and Model 90 (1931)


Nelson, P. I., 2020. Philco Model 90 Cathedral Radio (1931). [Online]
Available at: https://antiqueradio.org/philco90.htm
[Accessed 3 February 2021].
TubeRadioLand, n.d. Philco Model 20 "Baby Grand" Cathedral Radio (1930). [Online]
Available at: http://www.tuberadioland.com/philco20_main.html
[Accessed 3 February 2021].
This is the other style of radio (hardware wise) that evolved overtime. The Model 90 is an improved version of the Model 20 (with only a year difference in production). It unique look, improved performance and a good distribution meant that it became a huge success.
With '300,000 units (including the upgraded Deluxe version) were sold, catapulting Philco to the number one spot in the industry, where they would remain for at least the next decade.' According to TubeRadioLand for the Model 20. This suggests that this style was the prominent radio for the 30s and therefore is a key area of research to explore.
The 2 main styles were console and floor standing. The 90 was a major improvement over the 20. According to antiqueradio 'it adopted the newer superheterodyne electronic design, which offered better performance than the finicky TRF (tuned regenerative frequency)'. It also had tone control (treble and base), had 9 tubes over the 20s 7 tubes and was more sophisticated in style.
Silvertone (1937)
The radio that was all the range in America through the great depression and WW2. They were 1 of the first to use heterodyne receiver architecture. This meant that the frequency range was much nigger than what had came before it.
https://hackaday.com/2014/09/09/welcome-to-the-old-school-restoring-antique-radios/
1930s radio was the golden age. It exploded in the 20s and was being replaced in the 50s. Radios became smaller and cheaper as the years went on, making them more and more accessible to the public. There were the centrepiece of furniture and the main source of information and entertainment for many families.
News was released to the public much faster than before, only a day later. Communication was greatly improved amongst the people. At this point, advertisements were common and capitalised upon, introducing the idea of sponsors. The end of the 30s saw the decline of radio due to new 'visual technologies'
https://www.pbs.org/opb/historydetectives/feature/radio-in-the-1930s/

Model 20 (1930)
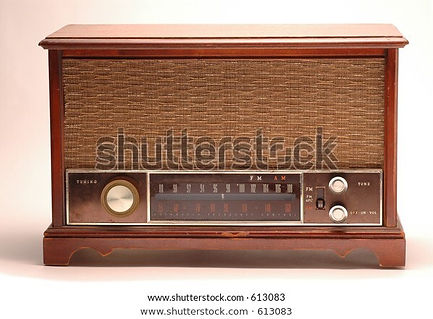
https://www.shutterstock.com/image-photo/antique-tube-radio-1940s-613083
This is an example of a radio from the 1940s. Like the 20s, it is a lot more compact. Radios got smaller and cheaper as the years went on. However the style has changed a lot since the 20s. The mesh speaker is much bigger than before. There is a greater range of frequencies (see the bar) and more ways to customise the settings (such as volume, bass, treble...).
All these examples and research into the history will help me inform my interactive in the radio section. I needed to get some examples to get an idea of how to customise the interface. The buttons will be used to change slide and activate a "new frequency" to discover more info on my character.
Radio Interface Drafts - 3/2


These are my 1st drafts of the radio interface for my interactive idea. The plan is to use the buttons to change frequencies and access broadcasts that will tell more about my character. The trick now is to decide which style and era to progress. I'm a fan of the console style myself. The floor style wont work as well for the PowerPoint. All the slides are in landscape while the floor version would require a portrait. Constantly changing aspect rations would not be a good idea in terms of design. The 20s style is nice and compact but lacks the necessary buttons. There are also a lot added on that would only confuse the viewer.
Furthermore, the impression is also an important factor. If a person was to think of an old radio. Chances are they would think of the old 50s style clean plastic and circular speaker. Or the retro 40s style of the bottom right radio.
The 1940s radio is the one I will carry on developing at this stage. I need to clean the line art and add the colour. I also will have to decide how ill incorporate my theme of horror into the design as well. the plan is to make the audience scared. The audio side will be the primary way of doing this but the visual design will also contribute to it. I need to "unsettle" the viewer while keeping it grounded at the same time.

TV Research - Examples, Drafts - 3/2
The rough document holding any examples and notes taken at the time. Although this 1 only contains the links during research


TV Examples and Drafts - 5/2


Electro Props, 2021. 1960s/1970s Philips black & white 20" TV in wooden case. [Online]
Available at: https://www.electroprops.co.uk/66/Televisions/1960s1970s-Philips-black-white-20-TV-in-wooden-case-P2542.html
[Accessed 5 February 2021].
fppt.com, 2021. Useful Tip: Disabling PowerPoint Left Mouse Click To Advance Slide. [Online]
Available at: https://www.free-power-point-templates.com/articles/useful-tip-disabling-powerpoint-left-mouse-click-to-advance-slide/
[Accessed 5 February 2021].
Microsoft, 2021. Reuse (import) slides from another presentation. [Online]
Available at: https://support.microsoft.com/en-us/office/reuse-import-slides-from-another-presentation-c67671cd-386b-45dd-a1b4-1e656458bb86#:~:text=Copy%20selected%20slides-,Open%20an%20existing%20presentation%20or%20create%20a%20new%20presentation,want%20to%20insert%2
[Accessed 5 February 2021].
Nelson, P. I., 1995-2020. [Online]
Available at: https://www.antiqueradio.org/art/motvt7300.jpg
[Accessed 5 February 2021].
Nelson, P. I., 1995-2020. Motorola VT-73 (VT-71) "Golden View" TV (1948). [Online]
Available at: https://www.insider.com/the-evolution-of-tvs-through-the-decades
[Accessed 5 February 2021].
oldtechnology, 2014. South West England Vintage Television Museum. [Online]
Available at: https://www.oldtechnology.net/mono.html
[Accessed 5 February 2021].
Science Media Museum, 2014. THE BEGINNING OF THE END OF BLACK AND WHITE TELEVISION. [Online]
Available at: https://blog.scienceandmediamuseum.org.uk/the-decline-of-black-and-white-tv/
[Accessed 5 February 2021].
Wilson, M., 2020. How TVs have changed through the decades. [Online]
Available at: https://www.insider.com/the-evolution-of-tvs-through-the-decades
[Accessed 5 February 2021].
Essentially, I done the same method of research as I did with the old radio. I researched into the backstory and history of the technology, I then drew several rough examples of possible interfaces. Then finally developed a single one further ready for the interactive. Positively, I was successful in establishing the model I wanted to carry forward. The rectangular shape and the bigger screen help and compliment my aspect ratio of 1920 by 1080. It will also be easy to navigate with the simple button pressing for the dials and switches. Although negatively it is just a tv. Granted it is my version of an existing tv but when it comes down to it, it is only a tv. This section was written much later on form the creation of this. And since then I have came to realise that the idea is very basic. Granted it's thoroughly experimented and research and documented but at it's core - the idea is basic. I need to be more creative going ahead in the future. In terms of how I will use this, it is 1 of 3 core elements of interactive no 1. Without these drafts the tv section of my interactive wouldn't exist. What I plan to do is expand further into the technology and create a full coloured version of the chosen tv above.
Key Interactive Areas - 5/2, 7/2, 8/2
The Purpose/Intent
My intent is to tell the audience information about and to introduce my character in an exciting and engaging way. To build an emotional connection with it, to make them initially fear it. I want them to feel scared during the introduction.
The Take Away
The ideal takeaway is to make my character seem like a threat. Show show is control in not only the story, but the product telling the story. The audience is apart of the world of my character, what happens in the characters world should affect the experience of the viewer and the way they interact with it.
Theme
The theme is horror, specifically psychological. I am implementing a few jump scares here and there but the key areas will be in the overrides. To give the impression that my character is slowly taking control of the interface. I want the audience to feel scared. I want to make them feel not safe in using this product. To put them on edge. To show my character as an unstoppable force that can get to ANYONE, including them...
Product Design
So how do I implement the theme into my product?
Well i had a few ideas. The plan is to change the overall mood of the interface depending on what information is being accessed. Make it bright and easy-going when perfectly safe. Dim the colour in more serious situations and go full horror mode when the character takes over. Every time the character is directly there it will get more and more dangerous. He will be at his most deadly when he starts taking control of the interface.
The Technology
I plan to use 3 main pieces of technology in my design. The radio, in which the interfaces can be seen below, the TV (old black and white) and a modern day PC. The idea was to confuse the viewer initially on the time period. Get them to believe it is set in the past to later find out its set in present day. The reason was going to be for security measures. Old technology wouldn't have access to the internet and no one from the outside would have access to the hardware itself, making it very hard to access. T The PC would be the only connection to modern day technology, where files are sorted in present formats (something the viewer is used to).
Radio Continued - Main Interface - 4/2


This is the final interface of the radio, although buttons still need to be added in these screenshots. As explained in the questions above. The idea is to put the audience on edge. The public news report will be told on a bright, warm coloured homely radio. As the character gets closer and closer to breaking the 4th wall, the radio will darken. The black and white radio will be used in a traumatised witness interview, talking about the character. The radio will go a deep red when the interrogation of my character begins (the 1st time the audience will hear him speak). And when he takes over and addresses the audience, taking control of the device, it will be at its most dangerous. At this point all the buttons will throw them to the next section and carry on from there.
Overall, the dark red radio fits the horror elements and the colour design of the plague doctor really well. I will control the audiences emotion through colour and sound. During interrogation, the plague doctor will slowly work out he's being observed and controlled. It will be the reverse (the destruction) of that control that will truly scare the viewer. It will become a tug of war until the final moment. Early slides will show info and tell the story from other perspectives. The final scene will show it from his view, his side. Then ill be able to show the understanding and motive of my character, as well as his true nature and personality.
Button Experiments - 4/2


The Experiment I done with my new buttons and radio interface. Basically I imported all my slides into a new PowerPoint before I put them into the draft. The aspect ration and quality was fine. I did realise the buttons need to be separate from the image in order to work. And the canvas size affects the clickable area (solved through cropping).
The 2nd draft, an alteration of the 1st with the new radio slides added. Where I have started altering the 1st drafts to include more visual references than the 1st draft. Also some unnecessary slides may be cut to save time and space. I only have 6 weeks to do this as of this time.
Turns out the canvas size determines the clickable area of the buttons. So I had to crop the extra space down in PowerPoint itself. because I had the slides altering, I wanted to make some matching buttons that alter with it. There is the normal set and the demon set (a darker red and a few other alterations). There wouldn't be a point drastically changing the theme if the buttons remain the same. The lighter buttons will be to show what's been selected to help the user navigate the slides.
In this, I experiment with several fx settings (particularly the bevel and emboss setting. I also experiment with inner and outer glow to see what effect it has in the PowerPoint.
Photoshop Techniques - Moxie2D - 3/2

After getting to this stage, I realised that my Photoshop skills needed much more work. The majority of this project was done during lockdown no 2 (between mid December and early march). Even know I have made progress on the elements of the project itself, the skills I used to complete this have not changed that much. So I decided to solve this through some photoshop tutorials to help improve my interactive. The templates, buttons and certain gifs are designed in Photoshop, so it makes sense to learn a new skill or two.
Moxie2D is a Art and Pokémon playthrough YouTube channel. He combines gameplay with digital art in many of his videos. Among his uploads was a video specifically for digital art. In this I got a crash course through Photoshop and an expansion of many of the tools I commonly use (e.g. the lasso tool, brushes, canvas flip...).
It was incredibly helpful and taught me many new tools to use and new techniques of the ones I knew. It was nice to get a refresher. I plan to use these new techniques in my interactive templates coming up after this video. Furthermore, they could also help in the official copy of my character design (in visual). The techniques are screenshotted and explained briefly below. They are all my own experimentation with the tutorial above.
Moxie2D, 2020. Easy Digital Art Tips That Changed Everything. [Online]
Available at: https://www.youtube.com/watch?v=-EAfjsML4nY&list=LL&index=6
[Accessed 3 February 2021].


On top of this. The video linked me to a new brush pack. I got access to 3 free brushes that covered the basics as well as an extra 20-25 brushes for a cheap price. This will give me much more versatility and options within my artwork. Before Most of my brushes were just variations of the originals in Photoshop (with 3 exceptions). New I have access to a diverse range, a great benefit to my project and later digital art works. In direct terms this will allow me a much greater amount of options in creations in photoshop for my project. The buttons and certain gifs are Photoshop made, my character is photoshop made and the templates themselves are made in photoshop.
Photoshop Techniques - PHLEARN - 3/2


This was one of the many pointers in the video above, although I didn't quite understand it. Even after multiple viewings I wasn't to sure how the method worked. So I found an additional tutorial specifically on this tool. Although I may not use Dodge and burn in my artwork for this project specifically, it may be a handy skill to have going ahead in the future. This was just for my own understanding with minimal impact on the project itself (some extra experimenting).
My rough notes at the time of watching the video can be seen in black boxes throughout the screenshots.
Lasso shading (a tip in the Moxie2D) will be used in later digital art works and stands more of a chance of having an impact in this particular. For skin and shadow especially, it will let me get the gradual blend into the main colour (rather than painting them in after). Combine that with the ability to hold multiple lassos at once, I will be able to greatly improve my artwork.
PHLEARN, 2019. Simple Dodge & Burn in Photoshop. [Online]
Available at: https://www.youtube.com/watch?v=meFr1mKkWqM&t=156s
[Accessed 3 February 2020].


My experiments can be seen in the above screenshots. Essentially it was another experimentation with the new free 3 brushes I was given. However the dodge and burn makes the lights lighter and the shadows much darker. It greatly increased the contrast and gave much more control on how the lighting fell. It did take a while to understand how it worked but I got there in the end. This isn't necessary, more of a fact that I wanted to do it. I have to include visual elements in my interactive, I chose to use Photoshop to do it (then later animate). I wanted to develop my skills, then decide to do watch these videos to do it. To enhance my use and variety of tool to create much better digital art works going ahead.
PowerPoint Draft 2 - As of this Moment - 5/2


This is a continuation of the original idea of my 1st draft. Essentially I made improvements to the radio interface and removed many unnecessary slides. The slide count was dramatically decreased (as feedback suggested that people got very confused with the "master slide" feature at the end). The amount of buttons and their functions were expanded upon in the radio too. How the user interacts with it also changed in many small ways. The idea of all buttons going to a hack in with the radio is a new feature to the original. Besides that it is essentially a slightly more refined version of the previous draft. My sources of help are screenshotted above. I went to these 2 websites to solve 2 main issues. The idea of importing slides from other PowerPoint projects (done successfully0 and turning off slide transitions veer mouse click. The mouse click disable meant I had much more control in guiding the users down the path I want them to go. The importing slides was a good shortcut in saving time. I could copy and paste my experimenting slides directly into the PowerPoint instead of re-creating them all over again. Although much needs to be done. I plan to carry on designing the interfaces for the PC and TV going forward. I need to create sound (as none currently exist) and get visual elements created as well. I am happy with the overall progress but also a bit scared of how much I have to do. I may of bitten off more than I could chew.
TV Research - Wood Effect - TV Design - 6/2
This was yet another tutorial to help me in my Photoshop improvement endeavour. However this has a direct impact to the interface of my interactive. The plan is to mimic the old TV effect by creating semi-realistic textures of wood in Photoshop (rather than just the wood coloured shading of the old radio). I followed the method given in this video without any major issues. It was confusing at times as I was using tools I have never used before but I got there in the end. It was a lot of fun but also looked far to realistic in my opinion. The art style conflicted to much with the rest of it. The shading with the realism of the wood did not mix. I had to find ways to merge the 2 together more naturally to create the results below.
This entire section is in the wood effect itself, later down this interactive page I carry on with the TV and complete it to a standard I was happy with.


Photoshop, 2. M., 2017. How to make wood texture in Photoshop. [Online]
Available at: https://www.youtube.com/watch?v=o_86ZvhiFD0
[Accessed 6 February 2021].


Positively I got a amazing result. I would never of got the wood to look this realistic without the help of this tutorial, giving a huge impact on my TV interface and their fore my project as a whole. However, as said above, it looks too realistic and will conflict with the rest of the art style. If I was to do this again I would experiment and alter the method myself to get a middle ground style. Something more "semi-realistic" compared to this. Although this art will be directly used in my interactive template so the effects on my project are evident. In conclusion there is much more work to do before I'm finished but I am on the right track.

Free Time - Mental Health - Application - 5/2, 3/3

Essentially, I would of overworked myself at this point. Most of my time was spent on the TV and radio from researching to design to implementation and so forth. What I honestly forgot about was drawing for fun. It would of been so long since I drew for the sake of drawing that I forgot how it felt to just let loose. All my stuff would of been towards my college work. But the pure relaxing joy of drawing for essentially "why not" felt amazing. Below I used several techniques to create work in a different style to my normal digital pieces. I compared my sketching of pre-work and my thick line art from my early days of the tablet, coming to a compromise between the two. The background was inspired by forest pictures online. Bulbasaur himself is a character I have been drawing for years. I used to draw Pokémon all the time when I was young (7 onwards...).


The design is deliberately cartoony through the use of base colours and clear cut highlights. The line art stands out in the image and few soft brushes were used). Honestly it was good for my own health to do this and a example of my skill when I'm just drawing for the sake of it. I'm better of cause of it, even if it has little impact in my interactive overall.
13/3 - This particular day I have been going back and writing up old work that was uploaded above (specifically between the radio and TV section). At the time I thought this would have little impact on my project, I was wrong. There was a big issue with layering gifs made in adobe animate with Photoshop png's. I ended up having to import the photoshop image into animate and exporting it as 1 big gif. That meant the art style was limited to just 2 brushes. This limited "cartoon" art style was one of the few available to me. I used the block colouring and the layering effect to imply blends, light and shadow. This work is the original version of this art style that my interactive took overtime. This was the solution to an issue I didn't even know about tell weeks later. This is an enormous relief as I was worried about what I was going to do. A lot of the interactive elements rely on these in order to function. I would of had to do some major restructuring otherwise.
Free Time - Shading Tutorial - Cartoon vs Semi realistic - 6/2

Leading off this cartoon style, in another bit of free time, I watch this video on shading. I got a very basic human below and used this video to attempt colouring him in. I mimicked the techniques here and tried my best to adapt the method. The result didn't come out well but I wasn't expecting to on my first attempt. It was a lot of fun and definitely made my evening. Issues in anatomy make my character looked off to the eye. The arms hang off and stick far to outwards compared to the chest. It looks far to flat. A small angle would of been good to solve this. It would also establish which arm is in front and behind the chest. The shading, although rough, is actually quite nice in my books. It brings depth, although only a little, to the character. I do reckon the brush used was far to soft which resulted in the clouded effect. Compared to the base colour of underneath, it only contrasts further. It did teach me a good technique with the selection tool. I can use the lasso tool to corner off areas of highlights/shading and brush over them without smudging the entire image. This technique was my main takeaway and one I will use for further development in my digital artworks.
Nadiaxel, 2021. Shading Tutorial 🎓 Cartoon VS Semirealism + Rendering Techniques. [Online]
Available at: https://www.youtube.com/watch?v=xkHlaMNDIDg&t=304s
[Accessed 6 February 2021].


TV Continued - 6/2, 15/2


This is the continuation of my TV interface and one of the last works produced for the original idea. The yellow area is the aspect zone where the videos/gifs would of been placed over the top. The wood effect was altered with shadow and many gradient layers. Areas were drawn in the same style of the old radio. The Lasso tool and layer lock especially came in handy when creating these gradient areas. The gradient areas themselves were a combination of smart layering and a soft brush with low opacity. This was the high point of the original idea. The peak or the best it could get. I was happy with it, content even, until I had a conversation with my tutor Adam. More detail regarding the feedback of Adam can be found below. The buttons themselves were a very uneven shape. It was intended as a placeholder until the buttons were design for the TV. It achieved the effect I was aiming for. However it does feel generic. Once again, it is just a TV. My aim was to keep it grounded but it feels very uncreative as of writing this (13/3). My plan at this stage was turned upside down. Although because of it my interactive has reached new heights that wouldn't of been possible otherwise. It was a huge wake up call but an essential one (even if I was annoyed for an entire week after).
Modern PC AND an Unexpected Twist 9/2, 15/2


The original idea was to have me interactive centre around three main pieces of technology. The TV, old radio and modern PC. The idea was to use old technology to hide vital bits of information. There would be impossible to find digitally and even harder to take over. However this idea wasn't very developed. I took the first thing that jumped into my head and ran with it, trying to get as much done as fast as possible. This meant that a average idea got well developed, but at it's core remained only acceptable. When showing my tutor this he immediately saw a problem. The modern PC would of been completely out of place with the other technology present. Also the TV would of been too similar to his brief (a custom PitBoy of his design[Fallout]). So essentially he said I developed this as far as it will go but I was in need of a change of direction. He gave me 3/4 hours to go away and come up with some new ideas. Create some drafts of interesting interactive ideas. They don't have to be grounded in reality. I needed to be more creative.


I didn't want to abandon the roots of what I have done so far. I just took the ideas and attempted to explore interesting ways of using them. The first 2 ideas was to combine technology with a human and the 2nd was to completely surround the user. This took the form of a simple computer chip that latched to the brain. Have a screen and button to control/influence the human. This idea of technology controlling the user was fascinating to me. So I experimented further. The 2nd idea was to surround the user in technology (old and new alike). This giving a more chaotic perspective, one that trapped the human. So what if I made the technology physically trap the person? I created 2 drafts of being held hostage, forced to interactive with all the screens and sounds. I had 1 where the technology physically used the user, in this brief idea as a power source. My main inspiration there was the matrix. And finally I created a miniature human that sat in the mind of the user, surveying the outside world from within the head (an expansion of the computer chip idea). I also had a variation of this idea, by making technology combine to maker the form of a human (more transformer inspired). Have my character fight this technology shaped man, slow done the hand to hand combat for the interactive user to selected certain parts of the body to play.
My chosen theme from previous was horror. And although my interactive idea was influenced by it, there was not a lot of visual evidence that delved deeper into it. So this next idea was completely different to the one of before. Have a creature locked up in a room. Blood dripping from the ceiling, writing scratched into the walls. Nightmare material was my goal. I would of had the interactive user click on these key features to look deeper into them. Have flashback sequences or voice over to tell them information. A lot of potential to play with and many routes to explore from it.
My issue with before was I didn't change any of the chosen technology, I was merely using what already existed. I need to be creative, to create something new. Weather that is combining technologies together. Making up my own on the spot or greatly playing into the themes surrounding them.
The final idea I decided was a combination of all the above. Have the viewer sit in a secret control room, with buttons and dials to interact with. A viewing area, like a guard watching security cameras of a prisoner. Make the prisoner my character (rather than random nightmare creature). It would allow me to create any interaction I wanted. I could have a chain dangling from the ceiling than pulls the character back to the wall. I could electrocute him. I could have a big red emergency button that activates red lights and blows everything up. I could flood the room, break the cameras, have the creature escape....
The possibilities are endless. The user is surrounded by technology with the choice to give into their urges or to treat the prisoner like a human. Technology controls the outcome of the prisoner and the fate of the user. The user has no escape from the room. They are as much as a slave as the man they guard.

A lot of what my tutor (Adam) told me was in a call. I have the left overs of the text screenshotted above as evidence. The ideas were much more creative and elaborate than my original of the 3 technologies. it still holds the themes and ideas of before (with the screen and radio carrying over) while using them in a creative way. There is much more room to play with how the user interacts.
I'm generally excited as to what comes out of this. Going ahead, I need to create more flowchart drafts and plan out how the interactions will work. What kind of interacts I want to include and what message I want to show the user. What experience do I give them, what's the take away?
I also need to incorporate my characters backstory and profile into the interactive, tell it in an engaging way. In conclusion there is a lot to be done and a lot of different avenues to take. It doesn't have to be finished but the journey must be shown.
Expansion Ideas of Draft - 15/2, 17/2


The next stage is planning. Before I start experimenting with the idea I need to decide what I have to do and what I want to do. This isn't a flow chart (or at least a very early flow chart) but more of a sketch of the idea. I ponder what to include and how to incorporate it. This new idea is to have the character locked down in chains in a prison room, monitor by TVs. The user will be sitting down and be able to interact with items in the control room. The goal is to tell the characters backstory through written files, audio clips, images (photos). The user essentially plays god over him, weather he is punished/tortured or rewarded/treated like a human being is up to the user. Depending on the decisions depends on which ending you get. The first (the abuser route) he breaks out, arrives behind the user and knocks you out. Then you wake up and essentially swap places - a taste of your own medicine. The second route he breaks out but you survive. You showed mercy to him and he will likewise do the same - living to tell the tackle. This idea of morality mixed in with the horror elements is what I wanted to go with.
In terms of interactive elements. I would have hanging chains to pull the character back. Interactive PC screens, buttons activating certain traps, water tank, electricity, a fire tank and 2 rotating wheels that would play with audio files. Honestly this is much more exciting compared to my original idea. I have the creative freedom to do what ever I please, rather than being grounded to present day technology.
Early flowcharts can also be seen planning out how each slide will interact, although in pieces. However this is planning at it's most rough. I intend to draw out these plans in a computer for readers to understand the layout better.
The Chamber - 1st Visual Draft - 16/2, 17/2
The chamber idea is a combination of the control room screenshot and the horror room. Consider this an extension of the description above, this is only the digital copy of the notepad.
The character will be introduced on the screen. I would use clean audio for the voice (although robotic and altered) and old radio for the discs. Although the idea has dramatically changed, I still wanted to keep the good parts from my original attempt. That way all the research and build up wont go to waste, a new direction for what already existed. Positively, this is a lot more creative than the previous. I can invent new technology, bend laws and rules and generally have fun with it. The old idea was literately 3 pieces of technology that already existed - that's it. Now I can put my own spin on it. Although the concept itself till needs more development. It essentially still has the same functions as the old idea with only a small amount of variation. Ideas such as how I will manipulate fire and water and electricity still need to be explored. The chains are a nice touch, although it doesn't make sense in terms of the characters skill set. A man who has heightened speed, strength and reactions. If he is "as tough as a bear" and can dodge bullets he can break out of chains by sheer force alone. The measure taken don't make sense in terms of the characters profile and backstory. Also I need to take into account the 1-5D design principles. Pages of text (mission report, diary...) is not pleasing to the viewer. Icons would be a better choice. The size of the buttons and which ones will create an interaction also need to be considered. How easy it is to navigate (a key issue with the previous attempt) and how complex also need more experimenting. I made it to complex last time, to difficult to navigate. Keeping it to a single room with a single ending will benefit more than a multiple ending, choose your own story, adventure. There is only so much time.


What I plan to do next is flesh out the ideas, the functions, what to carry over from the original and the story I want to tell. Instead of just viewing the character through a screen, it may make more sense to have the character locked up in the same room with the user (proximity pressure). The console is the main focus and a bit generic in my taste. The prison room itself plays into horror but not the main interactive interface. I want to experiment and explore to create a more interesting (more scary) template for the interactive elements to reside.
I like the idea of the characters weapons/armour being available to interact with. The discs will be my main focus. How they will interact and work needs much more research, especially into audio effects. However that for the audio section. In conclusion, I'm very excited to explore it further and see what comes out of it. This is going to be fun.
Back Room - 16/2, 17/2


This is my PowerPoint experimentation, the first draft of the interactive with the new idea. It's a simple experiment. I intended to see how the discs interacted and how I would transition between each slide. The action button was just like the original attempt (to the point). Although just selecting "next slide" leads to issues in transition. The interface is still in sketch form and will need greater research imputed. No sound was included. I had the tray move in and out and each disc was playable.
INTERACTIVE POWERPOINT DRAFT 2


Visual Inspiration - 1/3, 2/2
I have already mentioned that I need to do more research regarding the interface, the template in which all interactive features reside. So what makes a good villain base? I want to toy with the idea of trapping him in his own base, since every other prison made would be too weak to hold him. Thus implying his power and skill as a man that is hard to hold down. These key locations from pop culture show many different bases in simple black and white form. From Bond to Blade Runner, they all share similarities and hold patterns. Many use sharp, defined edges with wacky angles. A central area of main chamber followed by smaller sections. A looking view/platform to appear above the main character.
However, I stumbled across the room from Blade Runner 2049 and the simplicity striking me. Many lairs hold sharp objects, dangerous weapons and traps. Raised areas to look down upon everything else. However the room in question was mostly flat, with a central pod as the main area. A platform suspended above nothingness (or water but so dark it appears to never end). This was my main inspiration for my next variation of the control room.

MCMILLAN, R., 2012. Deep Inside the James Bond Villain Lair That Actually Exists. [Online]
Available at: https://www.pinterest.co.uk/pin/181269953728214772/
[Accessed 1 March 2021].


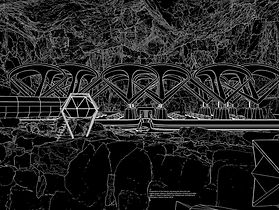
This lead me down a path where I found out as much as I could regarding Blade Runner. The replicants, the themes and the villain in question. It seems that emotion is withheld greatly in the move, with the hero's and villains. Shocking events play out with acts of violence and cruelty and the majorities reaction is very played down. This making any great amount of emotion that much more potent, a greater contrast to the feeling of emptiness.
The villain is terrifying. Although blind, the amount of power and influence he holds is staggering. His lack of reaction for the loss of life and his calm demeanour make him look like he is always in control .Everything is to his plan. Even if the victims are technically replicants, they easily pass as human. Looks alone they wouldn't be any different to a normal person. The authority to end themselves on a simple command from him. This lack of emotion is conveyed through the room as well. In my eyes it's cold and efficient, with limited features to differentiate it. Everything is stripped away making what little left stand out that much more. I will make mine more busy (as the Blade Runner theme would not be compatible with my own character) but want to use a similar layout. Features brought up from previous (such as the discs, fire, water...) will be built into the room and used accordingly.

Stewart, J., 2019. Take a Look Inside the Architecture of Cinema’s Most Infamous Villain Lairs. [Online]
Available at: https://mymodernmet.com/lair-movie-villain-hideaways/
[Accessed 1 March 2021].

FANDOM, 2021. Niander Wallace. [Online]
Available at: https://www.youtube.com/watch?v=xkHlaMNDIDg&t=304s
[Accessed 1 March 2021].
The main source of information I used was from fandom. Although I also watched a handful of YouTube videos to get a better grasp of the lair and the villain himself. The video that was the most useful is linked on the right. Overall I was shocked by my findings. Also amazed. This will have a great impact in my own work. I intend to use this as the foundation as my own control room/villain base.
The bit I'm especially interested in is the tank (the 1 big feature in the room). This will be the centre piece in my interactive (where my character is held). I intend to research further into specific elements I want to include like the tank. I still need to keep into account my theme of horror and how it will help improve my project.
The best source of these is Pinterest. It get high quality images and a huge selection of routes and tangents to explore. It is the best place (in my opinion) to find reference images online. It also allows me to see other examples of art by others, fresh ideas that can inspire my own work.
Francis, P., 2017. Blade Runner 2049 - Deckard Meet Mr. Wallace Scene - Her Eyes Were Green. [Online]
Available at: https://www.youtube.com/watch?v=FXgheg_jU4c
[Accessed 1 March 2021].


Pinterest, n.d. ArtStation. [Online]
Available at: https://www.pinterest.co.uk/pin/724235183823591925/
[Accessed 1 March 2021].
u/AnabelaRake, 2020. Hotpockets Bio-Warfare Laboratory by Beeple. [Online]
Available at: https://www.reddit.com/r/ImaginaryScience/comments/g5kwkq/hotpockets_biowarfare_laboratory_by_beeple/
[Accessed 1 March 2021].

solidsnake4545, 2019. 52 Pics And Memes To Improve Your Mood. [Online]
Available at: https://www.ebaumsworld.com/pictures/52-pics-and-memes-to-improve-your-mood/85970760/?image=85970766
[Accessed 1 March 2021].

MCMILLAN, R., 2012. Deep Inside the James Bond Villain Lair That Actually Exists. [Online]
Available at: https://www.pinterest.co.uk/pin/181269953728214772/
[Accessed 1 March 2021].
Out of these 4 images. The top left is my personal favourite. The emptiness and isolation of the tank. The colours, the red lights. I want to create my own version. As of writing this (13/3) the tank is at it's most basic state - essentially a red rectangle. I want to use these to inspire the design. Although 4 examples of bases will not be enough, which is why below I decide to create some mood board. This effect is what I am aiming for. A scary horror vibe. Dark rooms, limited colours. Various mechanical elements. Even know the current 1 is bright and colourful, I want to try and plan a setting where that is no longer the case. Depending on the time I have left. I want to grey scale the room with a few exceptional elements to draw the eye. A final stage per say. I must reach the deadline and have visual, audio and interactive elements present in my PowerPoint. That is the requirement. However how far I choose to explore each one is another matter. There has already been a great amount of work into the audio (the main carrier of the presentation). The visuals has been developed greatly with the interactive being the weakest element as of so far (with simple button (disc) presses). All the items are there to pass. It is now a matter of putting it together. These could hold a strong case of being visual alone. But in my eyes, they are the template of the interactive. They are the format in which the disc/buttons reside. There was also plans to have the fire and water be interactive and change, although as time draws nearer that is becoming less and less possible. I must get the ending first followed by the remaining disc audio as of writing.
Location Inspiration Mood Board - 1/3, 2/2

Many of these specific rooms will not be in my interactive but each had a piece that intrigued me. Each had something that I wanted to use as inspiration. Many used their choice and quantity of colour very well. Most shadowed in darkness with key focal points in the centre of the image. Other examples of 1 point perspective. Some with horror elements in mind and few on the basis of they looked good and let my mind wonder to new ideas. I feel content with my work again after such a sudden turn. Now I have research backing up my choices. My room will be something new rather than just 3 pieces of existing technology. I also created a second mood board for even more inspiration and references for my interactive (although this one character focused). This research is a collection of existing material in the hopes to make something new. Not how something that already exists can be mimicked.
Character Appearance Mood board - 1/3, 2/2

With the exception of some more specific tutorial videos to help during experimentation. This is the point where my focus should be on the creation of the interactive. I have researched and experimented and schemed and planned. Now I must do. I have just under 2 weeks left as of starting the interactive creation. If I start running out of time for certain elements then I will have to cut some stuff out. I notice I get very ambitious but reality must be faced. As long as the essential elements are there then the project will be a success. I'm a bit nervous about what I must do next. Positively, unlike last time, I have made the time to expand on the idea before diving right in. Negatively, the time I have left will be a limiting factor in the final product. I won't be limited by my ability (not as much in this case anyway) but more my time limit. Although if I wanted it desperately enough I guess ill make the time. However this is supposed to be my easier project in leading up to the fmp. I gave it my all even know I told myself to take it as a extended break. I do feel much more confident towards the end (positively) and my own skills have greatly improved since the end of project 1. I can now create animated (gif) elements in Adobe Animate. I can now produce and edit audio including voice over, sound effects and ambient sound. My human anatomy has slowly gotten better over time (still needs much more work). My Photoshop skills have also improved, with greater range of tools available and more tutorials under my belt. I am confident for the fmp. It just a matter of finishing what I started.
Interactive Template PART 1 - PHOTOSHOP - 1/3, 2/2
A lot of what my tutor (Adam) told me was in a call. I have the left overs of the text screenshotted above as evidence. The ideas were much more creative and elaborate than my original of the 3 technologies. it still holds the themes and ideas of before (with the screen and radio carrying over) while using them in a creative way. There is much more room to play with.
So the idea is to combine the control room and the prison into a single entity. I will hold the character in the centre of the room (as proximity plays a big role in fear). One point perspective will be my main go to. I did have to research how to create the perspective lines again. Although covered in a lesson, the method for the 2021 edition of Photoshop is slightly different. The issue being the old method I knew no longer worked, so I fixed it with discovering a new method, seen on the right. This was a big relief. I did not expect to run into issues this early into development. Positively, it was easily solved and I was able to draw the skeleton of my interactive template.
Art, M. D., 2020. How to Make a Perspective Grid in Photoshop 2021. [Online]
Available at: youtube.com/watch?v=sisxYrxhJ-c
[Accessed 2 March 2021].


The template is designed to draw your eyes into the centre of the screen (where the prisoner is held captive). I will be keeping the disc interactive side from the previous drafts and ideas. This will let me use and adapt the old radio effect for each recording. The discs themselves will be further developed than just the still image of the previous draft. The double spinning wheels in the control room will be shrunk down and spin with the disc. These moving elements will be developed in Photoshop (an extension of the button experiments). Stalagmites and rock formations will be used to frame the scene and provide depth through the use of layering and shadow. Given the time, I want the fire to also be an interactive feature. It would be nice for it to sky rocket upwards and then fizzle out. This would strongly tie into my visual experiments with fire and my ambient effects of burning and wind.


The water flow will go downwards and disappear out of view. The Foley sounds effects gathered from my bathroom will be combined and edited to create the ambient effect of flowing water. The sound design will be the main element in my Interactive Presentation with the visual drawing attention to each feature. The interactive itself will consist of certain button presses to activate certain audio events and visual (given the time). The template above was the original idea for what the template of the interactive shall look like. Dark and eye-catching. With the fire illuminating the room but keeping enough shadow to put the user on edge. The combination of dark red and brown to set the tones of danger and death. Even the calming blues of the water have been muted and corrupted by the glow of it's environment. Positively, there is a great atmosphere from this. The use of colour and direction has managed to create the desired effect of danger and distrust. Like something will jump out at them any second. Although negatively, the glow would hinder the animated elements. The source of the glow is the fire (which plans to move). The glow should move with the source. However the glow is impossible to replicate in animate and will look out of place (due to its unchanging stillness). Also in this particular example, the water is also fixed. The sound of water is created through splashes and movement. This is something else that also needs to be fixed by the end. I plan to focus on the interactive parts moving ahead from this. The template is made but the buttons are not. I need to figure out how the discs will interact and how I will make them move. The character himself also needs to be introduced and be shown throughout the presentation. He will need to be designed into it before the interactive is complete. At this stage of development, I am proud of the progress I have made and I'm looking forward to what comes next.
Interactive Template PART 2 - DISCS - 1/3, 2/2


This is the first and main interactive element of my presentation - the discs. The majority of the story shall be told through audio, therefore the use of it must flow and not be a hindrance to the project. For starters it must fit, designed to belong into the scene and not simply placed on top. This was why the white outline of before was such an issue. The existence of a white border would break the visual emersion of the user and negatively impact the project (design principles). The discs themselves were designed in Photoshop and be place on top of the template in PowerPoint.
In doing so, I can keep the shape consistent and have a much greater control over the colour and art style (compared to Animate). However Photoshop is a pain in the neck to animate in. Each frame essentially doubles the layers of the original frame. So if there are 20 layers in total and a 2nd frame is made, now 40 layers have to be loaded in. The 60 for the 3rd and 80 for the 4th... Thus in a matter of under 12 frames, the PC would have to generate way more frames than the average photoshop artwork. Even for my home computer (which is much better than the original Southend computers available) struggled to withstand that much workflow. Every change made to a single layer would force my PC to update several identical layers at the same time. Therefore I will only be using Photoshop to animate simple elements. The discs themselves were just made up of 7 frames at a high speed, that alone was starting to cause performance issue. Luckily only minor issues appeared - such as small delays occasionally, extra noise for the PC itself and longer saves.

By extending the outer border of the disc, I was able to solve the white rim issue. That issue was present in PowerPoint and Discord (although missing in Photoshop). The screenshot above, of a PowerPoint slide, shows my progress in solving this issue with each new export. Using the "Hue and Saturation" feature, I was granted free reign over the colour. This meant that I didn't have to individually create each disc, saving valuable time in the creation process. The results of this endeavour can be seen below. Although only 4-6 discs will be needed for the interactive, there are an option of 12 below.


The dual rotating discs was an idea in one of the first sketches of the control room. In the first idea, they were huge and would play in the background with the audio recordings. Now I have shrunk them down and will play alongside with the disc. They were produced using the same method as the discs with the same frame count. To get the spinning effect, the majority of the attention was spent on the shading (rather than the overall shape). I attempted to talke into account light direction when colouring them. The inside of the right wheel would be covered in shadow (as the main light source would be on the far right. Although the fact of the sources of above light soon shut down that plan. The existence of 3 separate sources made it complicated to establish a linear direction. Furthermore, the way the shading was done in attempt 1 meant that the right discs looked like it was freezing every cycle. The more I did it, the better I got. The quality of the left discs made the right stand out for the wrong reasons (so had to be redone).
Overall I am happy with the outcome. I plan to layer these new features on top of my interactive template to add to the business of the screen. This will attract the eye even more. Since little change is occurring between interactions (with the exception of the fire -given the time) I wanted to add constant visual elements to keep the user engaged.


However this lead to an issue. The fire was designed in animate while the template is a still png from Photoshop. When layered together, the fire had a white background that starkly contrasted with the shaded elements of the png. This completely destroys the idea of a single room. I would have to change direction in order for this to work. There were 2 possible routes to take. Animate everything in Photoshop and prey I don't use too many layers. Or create it in Animate but get limited to the use of 2 brushes. If the image was still it wouldn't be an issue. Use several still images as you transfer between each interaction (what many will do). What I have done is created a single image but embedded it behind the animation (1 big gif).
This meant the art style had to be completely changed. Luckily I have already experimented with a "cartoon" style using very base colours. In the Bulbasaur art made in my free time. This PowerPoint section was a small test run to make sure all the made elements were compatible. Thankfully I did this with enough time to re-design the visuals and to recreate most of the pngs and gifs.
A draft of this base style was saved from the mid production of the Photoshop template. This was imported into Animate with the animation elements and extra details drawn in after, finally exporting as 1 big 1920 by 1080 gif.

Interactive Template PART 3 - FIRE + WATER - 1/3, 2/2
Now it is time to focus on the big moving elements, the fire and water. I have already done a fair amount of research into water in my Project 1 material. Concept 4, 5 and 6 all heavily relied on it.
However fire is a very fresh concept to me. In my audio section, there are experimentations of me playing with actual fire in and outdoors. The real life sounds were combined to create the ambient fire sounds in the interactive. Videos of me burning stuff, an excellent reference for my animation.
Combine that with my previous drawing experiment of animation fire and I'm set. This video by Howard Whimshurst (the same YouTube in Project 1 that taught me to animate water) taught me the fundamentals of fire. How it flows, the cycle of movement. The method of creating it with the build up of stages to get there. The ending was especially helpful, giving me visual references and ideas of how to draw it. The feelings you want to convey heavily effects the colour and shape used. Smooth edges of a candle flame compared to the harsh angles of an explosion.
My particular fire animation style is a combination of the middle flames. The overall shape and colour style id like the middle left, especially the block colouring. However my lines are much more broken up and sharper angled (like the middle right). The plan is to transform that into a harsh burn. Flames (instead of going side to side like a wave) to rocket upwards in power to suddenly extinguish.
This video taught me the very basics of how fire works but made me away of a clear point. No one fully understands it. Fire is a very complex form and is interpreted in may ways. There is no wrong way to interpret fire, it all comes down to the impact you want it to leave.
My fire is apart of an evil lair so I want it to be harsh and unwelcoming. Although I don't quite want it in full explosion mode until the user clicks the button.
As normal, my attempts of animating fire can be seen below in many different times of production. From the sign wave (an optical dissuasion of movement) to the flames themselves, my attempts are well documented. I did notice that when importing a large quantity of gifs onto my wix site some of them corrupted. The site trying to load many moving elements at once was to much for wix to handle and so many stopped working altogether. However the core pieces of evidence was still there so it didn't cause to much of an issue.
The first sign wave attempt simply did not work. I had to redo this movement from scratch. If the foundations are flawed, the rest of the work will never work. After I was satisfied with the movement, I started the first layer of fire. Since I am stuck with a singular brush, I would have to rely on layering up colours to get bright/dark areas.
The red would be at the back and blend much closer to the dark red background. The closer you get to the centre (hottest area) the brighter the colour. Also the saturation here would be much dimmer, but the brightness significantly increased.


Whimshurst, H., 2018. Learn This Trick Before You Animate FIRE. [Online]
Available at: https://www.youtube.com/watch?v=EyWpeexlqp8
[Accessed 2 March 2021].


At the end of the first day in Animate for the fire, this was the result. The first attempt animating fire was done on my birthday (28th Feb) and was simply line art. This time I used colour, the first time I've ever used deliberate colour in a moving image. This (when finished) is by far my best and most complicated animation to date. We've come a long way from line art balls bouncing in December. In a nut shell, I am proud of my progress and feel restless to create more. When the deadline is met and I am not tied down by the looming work pile, I will carry on experimenting with 2D animation. Even if I don't take it as a career route, there is something special in the art I can't quite describe at this level. From drawing Pokémon and robots when 7, to my GCSE Art projects, to my Acrylic Paintings (between 10 and 16) and now finally to my digital and sketchbook works of present day (14/3).
I showed off my work in an Animation Discord, to others that also have passion in digital art. The user to respond back has created many fire/explosion animations that look amazing (and is 1 of the 2 reasons why I wanted to incorporate fire in the first place). I would post his work here as reference but didn't want to without his permission. It would be difficult to refence and I wanted to respect his work. He like it and gave me a tip or 2 in making mine even better. Filling in the gaps transformed it. I also added 2 extra layers to the flame and sorted out the shape of the original. The chaotic outer layer contrasted too much with the smooth inside - so I livened it up a bit.


I officially ran out of time but I cover the evaluation of the arm punch and water in the final evaluation below
INTERACTIVE POWERPOINT DRAFT 3
FINAL TO DO LIST - 18/3/21 - 4 DAYS TELL DEADLINE

With 5 days left and essentially just under 2 weeks work to do, I made a list and plane out what I will do each day. This meant that I will get everything I need done to finish my work on time without rushing like a lunatic. However, as of writing this (23:12) I realised this was too little too late. It was a good idea on paper but I over estimated how much |I could get done per day.. This meant on the day of "CRUNCH", I have a hell of a lot to do. The plan definitely helped and had a positive impact on my work, however it wasn't enough. I feel relieved I did it as I would of probably had a breakdown with all that I had left. See it as many small jobs instead of 1 huge mess definitely helped my mental state.
Interactive PLAN - Flowchart Series 2 - 22/3


Planning is key in my final interactive. The flowcharts above were necessary in making sure I knew what I was doing, and in documenting that it didn't come from nothing. After several experiments with flowcharts, fine tuning my method of choice, I created this. The plan is to have a very simple layout. I intend for the discs to be the main interactive elements. Each slide will reveal a new side to the Doctors past. I didn't realise this until the typing but...
The flowcharts are the exact same, just spaced slightly differently. A mistake made by me in the heat of the moment. I didn't want the end to be accessed straight after the intro, so I made a wall. The flowcharts themselves tell the same idea. If I was to do this again I wouldn't do the same Flow chart twice.
Interactive FINAL - SLIDE 6 - ESCAPE - 22/3
Avenir Light is a clean and stylish font favored by designers. It's easy on the eyes and a great go to font for titles, paragraphs & more.
123, T. R., 2021. blog 22 March - Final Blog. [Online]
Available at: https://www.youtube.com/watch?v=Me_ulHDDap4
[Accessed 22 March 2021].
123, T. R., 2021. slide end mp4 no 2. [Online]
Available at: https://www.youtube.com/watch?v=TDv2kLiAohU
[Accessed 22 March 2021].


These were 2 small issues I ran into when making the final slide. One was the disc. The blood red discs gif was fine in editing view of the PowerPoint, however it was lost when the video plays. So I had to go back into Sony Vegas and copy/paste it over the top of the existing vid, then export it as one. However, this meant that 100s of copies were made and started affecting my PC's performance. The blog I was doing alongside (although fine) froze at the end. The recording timer stopped ticking. This mass lag could of caused much harm to my recording file. In the end I stopped the recording and let it catch up. Then made the necessary changes to my video.
The results of my last slide can be seen above and is evaluated fully in the audio section. I am happy with the outcome.
INTERACTIVE POWERPOINT DRAFT 4 - THE FINAL
Above is my final Interactive, 3 months of work has lead to this. I have already covered the audio elements of this specific piece of work in the wix "audio section". I have a lot to say. Overall I am relifed this is finally in a completed enough state to hand in. Many of the sections had to be downgraded unfortunately due to my ambition and time. My original idea was a 40 slide Interactive in which I created a 10 minute animatic exploring the backstory and character. Several Photoshop still arts of images of the scenery, past life... multiple audio recordings of the public, news reports, interrogations... It was too much into the time given. Add that to the fact that I have never produced a digital piece onto a scale that big, it all starts combining into an unrealistic goal. This interactive is 6 slides and focuses specifically on the sound elements the post (hence why the 1st half of this evaluation is in audio). The visuals provided the template and design of the character, as well as the animated pieces of the project. The gifs were the hardest part to complete. Until this project started, I would of rarely attempted to animate digital moving objects. I had to learn all 12 of the animation principles and develop each area from scratch. This, if anything, was the biggest spend of my time. I originally predicted the fire element would taker a day to animate, turned into 3. The character punch 2 days (turned into 3, almost 4) and the template 2. The template (the main visual element) had to be completely redesigned due to unexpected issues. There were MANY problems that had to be solved along the way as well as the ones I knew about (e.g. the lack of sounds, visual or interactive in general).
Positively, I was able to meet all the criteria and finish before my deadline was up. I have already spoken greatly about my issue with time so I won't go into too much here. In regards to the visual elements...
The water could of used way more development. My main research source was my previous work in project 1. My concept arts were the main inspiration for the style of the water. However that is a still image. Getting that level of quality frame by frame would be nearly impossible for me at this stage (that or I need a lot more time). I should of done more experimentation first or at least found more examples of moving water to use. I had my Foley sound bathroom water, physical observation of falling water. But not rushing water. The fire itself I am especially proud of. I first did it as a "why not" outside the project. I wanted to learn how to animate fire so I did. I enjoyed it so much I incorporated it into my interactive. Through various videos and feedback, I greatly improved upon my original attempt (created on my birthday). The fire has already been evaluated above.
The arm punch animation is a different case entirely. Easily the most difficult thing I have ever animated. Considering my constant struggle of human anatomy and my inability to draw people at the start of the course, I have developed leaps and bounds from where I started. Most of my visual research was in learning human proportions, anatomy, lines of action and balance, character design... all in the service of creating a 3-4 second animation of a character punching. Easily my greatest achievement. Although it can be heavily improved. For starters the animation remains unfinished, with the character forming back into mannikin drawing at the end. Time forced me to carry on with the rest, otherwise I would of missed the deadline entirely. The animation that is finished is rough, with very sketchy lines (very unprofessional). However the movement is the most complex I've ever made it. I went from a single punch to a combination, with various hip twists, core strength, balance and much more to consider. My background in Karate (primary evidence) was the most valuable experience in this area.
The interactive elements are the most basic part of the interactive, simple button/disc pressed. The main development was in the visual template and the heavy reliance on audio to tell the story. Although, in my personal view, I class the visual template as part of the interactive, the actual interactive elements are the smallest part. Simple yet effect, it gets the job one. Of course there were many problems that had to be fixed, read above and in blog video. The Animate/Photoshop import issue was the biggest and force me to change art style. If I was to do this again, I would of included more interactive elements, or at least new way to interact. It was my plan to have the fire as an interactable object to increase variety. However that was scrapped due to time. That and creating the base fire took 3 days. It would of at least taken 3 more to animate it and that is time I am unfortunately missing. The water was also going to turn off. Hence why the fire and water developments ended up in the interactive section to begin with.
However the combination of all 3 areas. All the sounds (voice, Foley, ambient), all the visual (character, fire, water, template, animation...) and interactive (Photoshop buttons (discs), clickable shapes (action buttons), missing fire and water features... It all combinates into the interactive presentation of the above. I am proud of what I have created, glad I did it and wouldn't of wanted it any other way in terms of work load/produced. This has honestly been so much fun. Yes there were up and some of my lowest downs (especially at the start but that was external reasons) but it's all part of life. If I was to do it again I would stop stressing as much. Too many times I worried, I stressed and internally panicked. However I made it through each time. I developed my animating, voice acting, sound editing and many other areas as a result. I wouldn't be where I am now if It wasn't fo this project. This interactive is not perfect by any means, but it doesn't have to be. I dedicated 3 months of my life to this and what came out of it is nothing to scoff at.